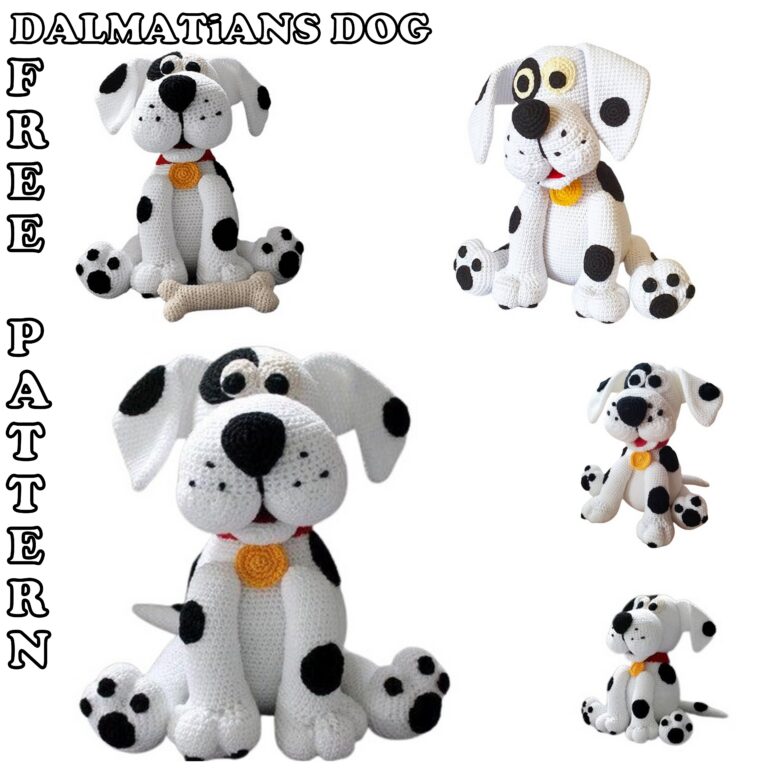
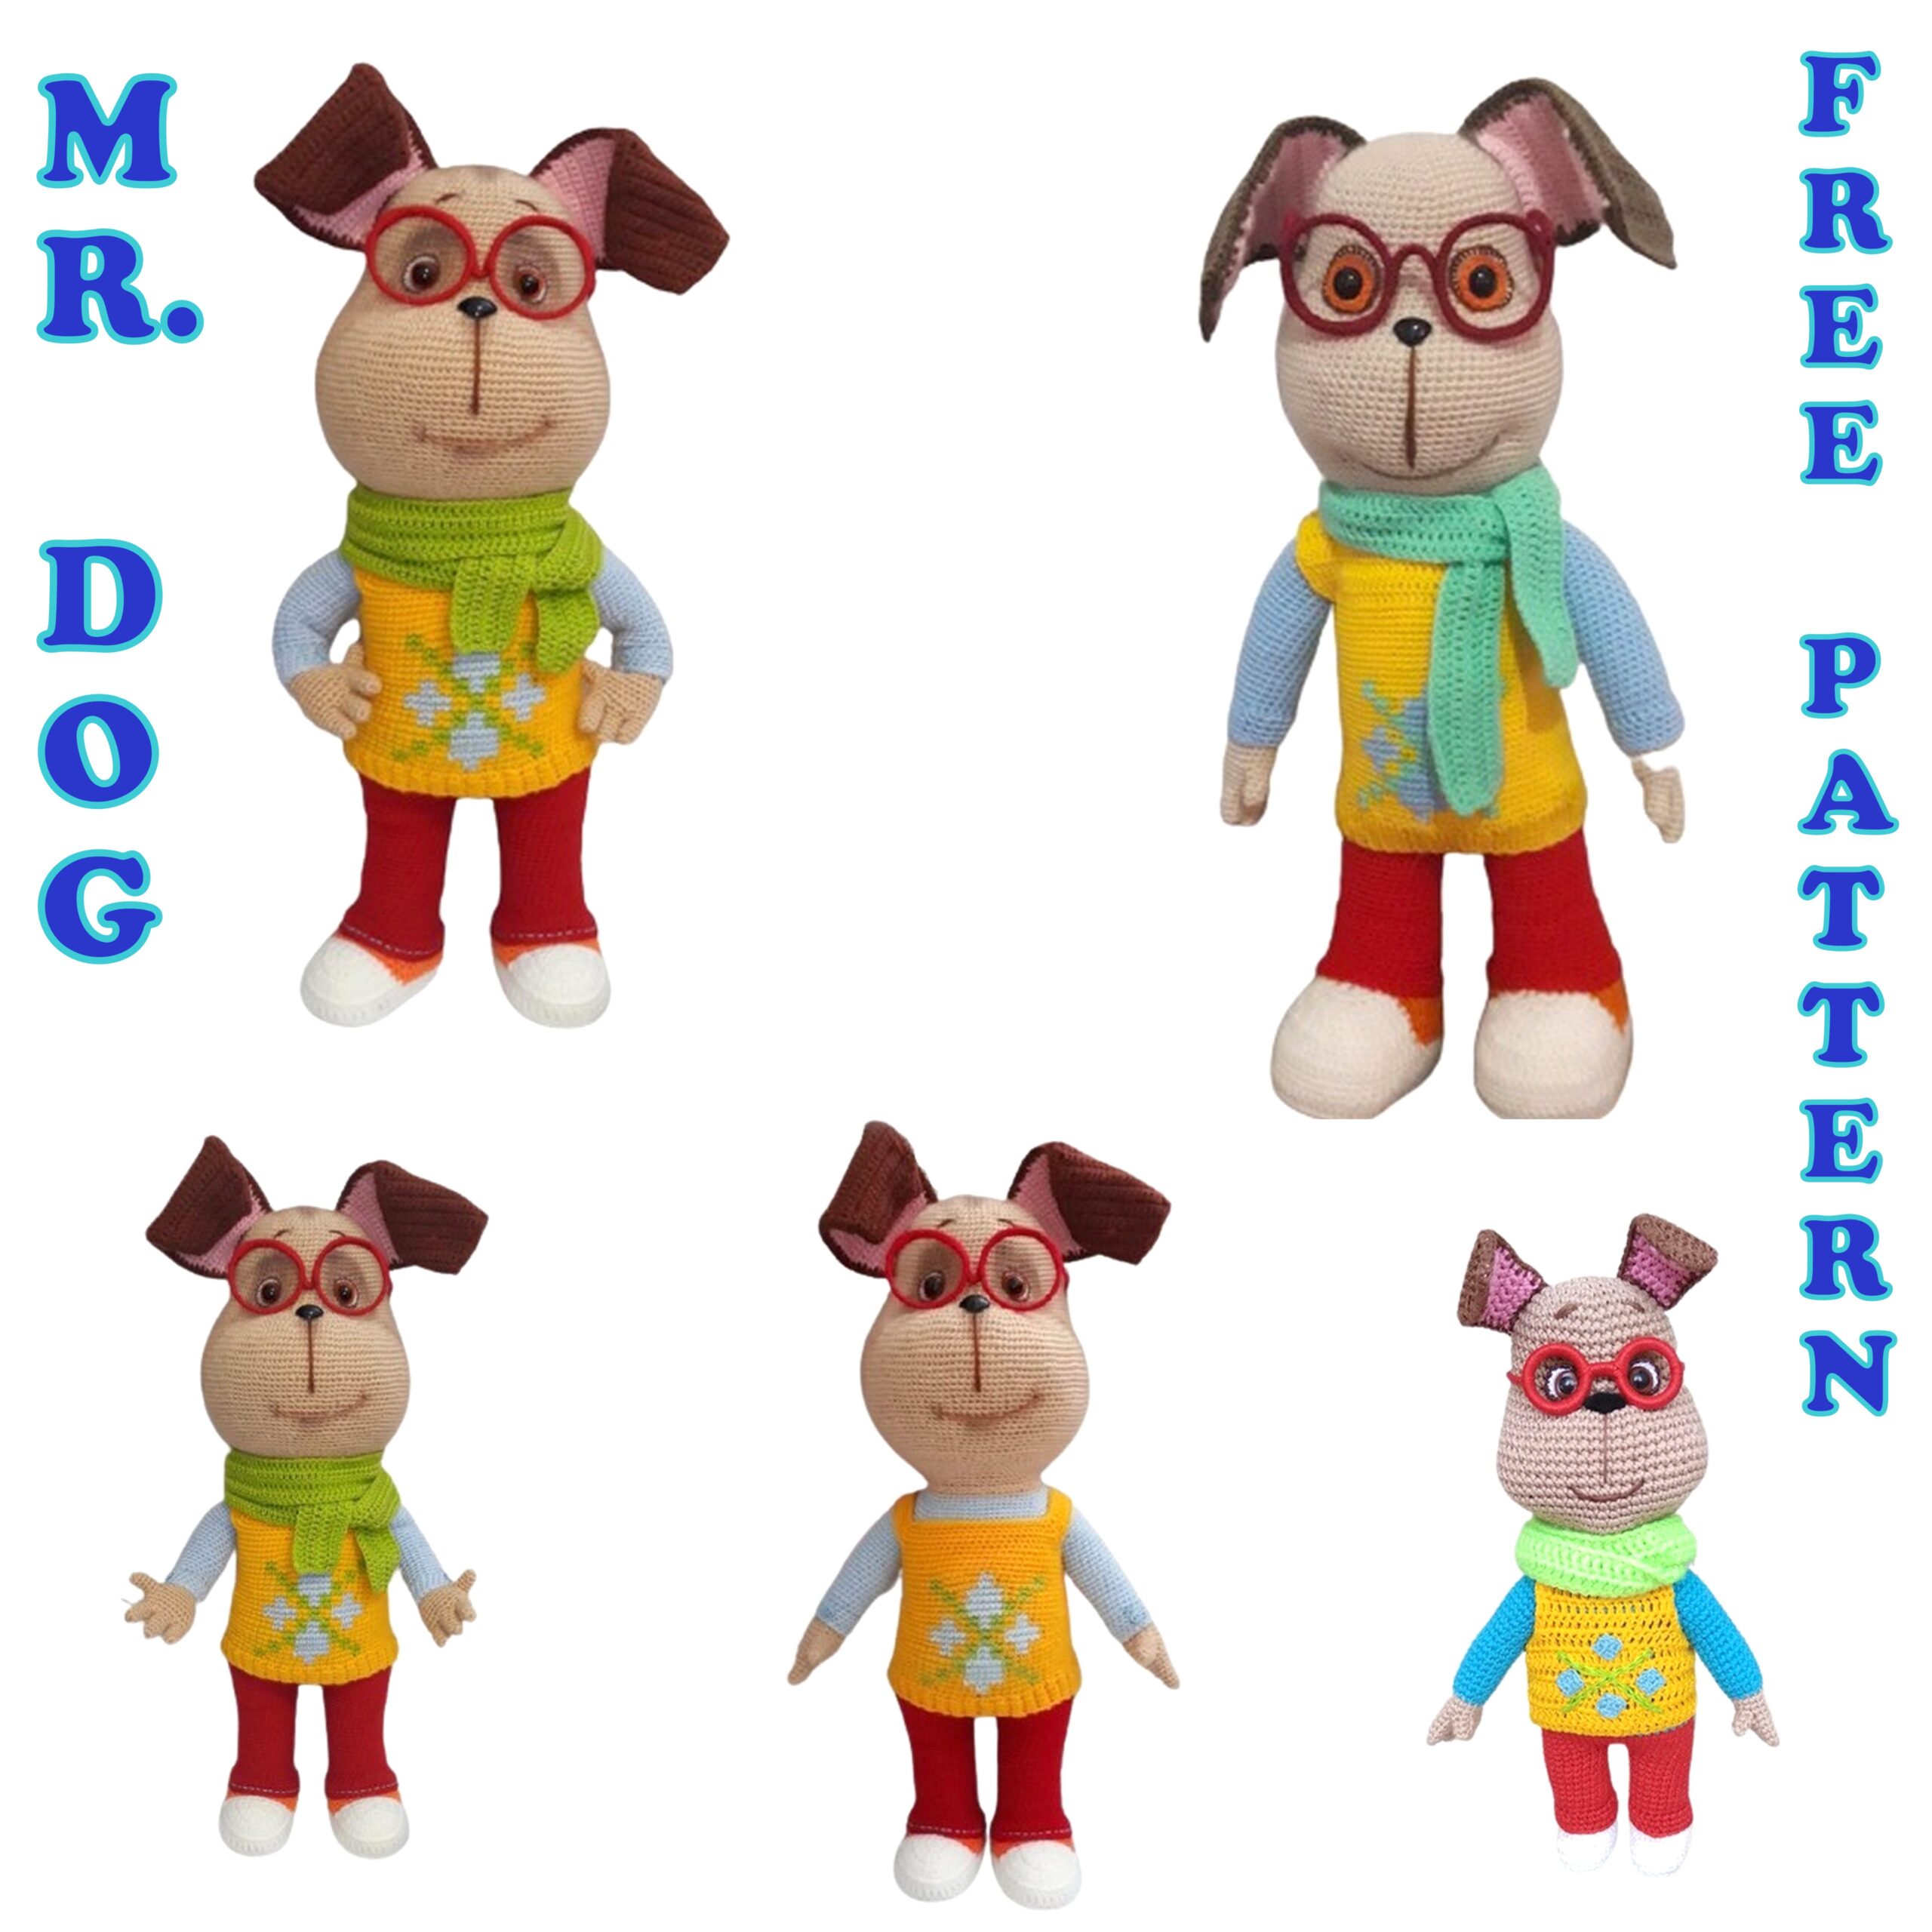
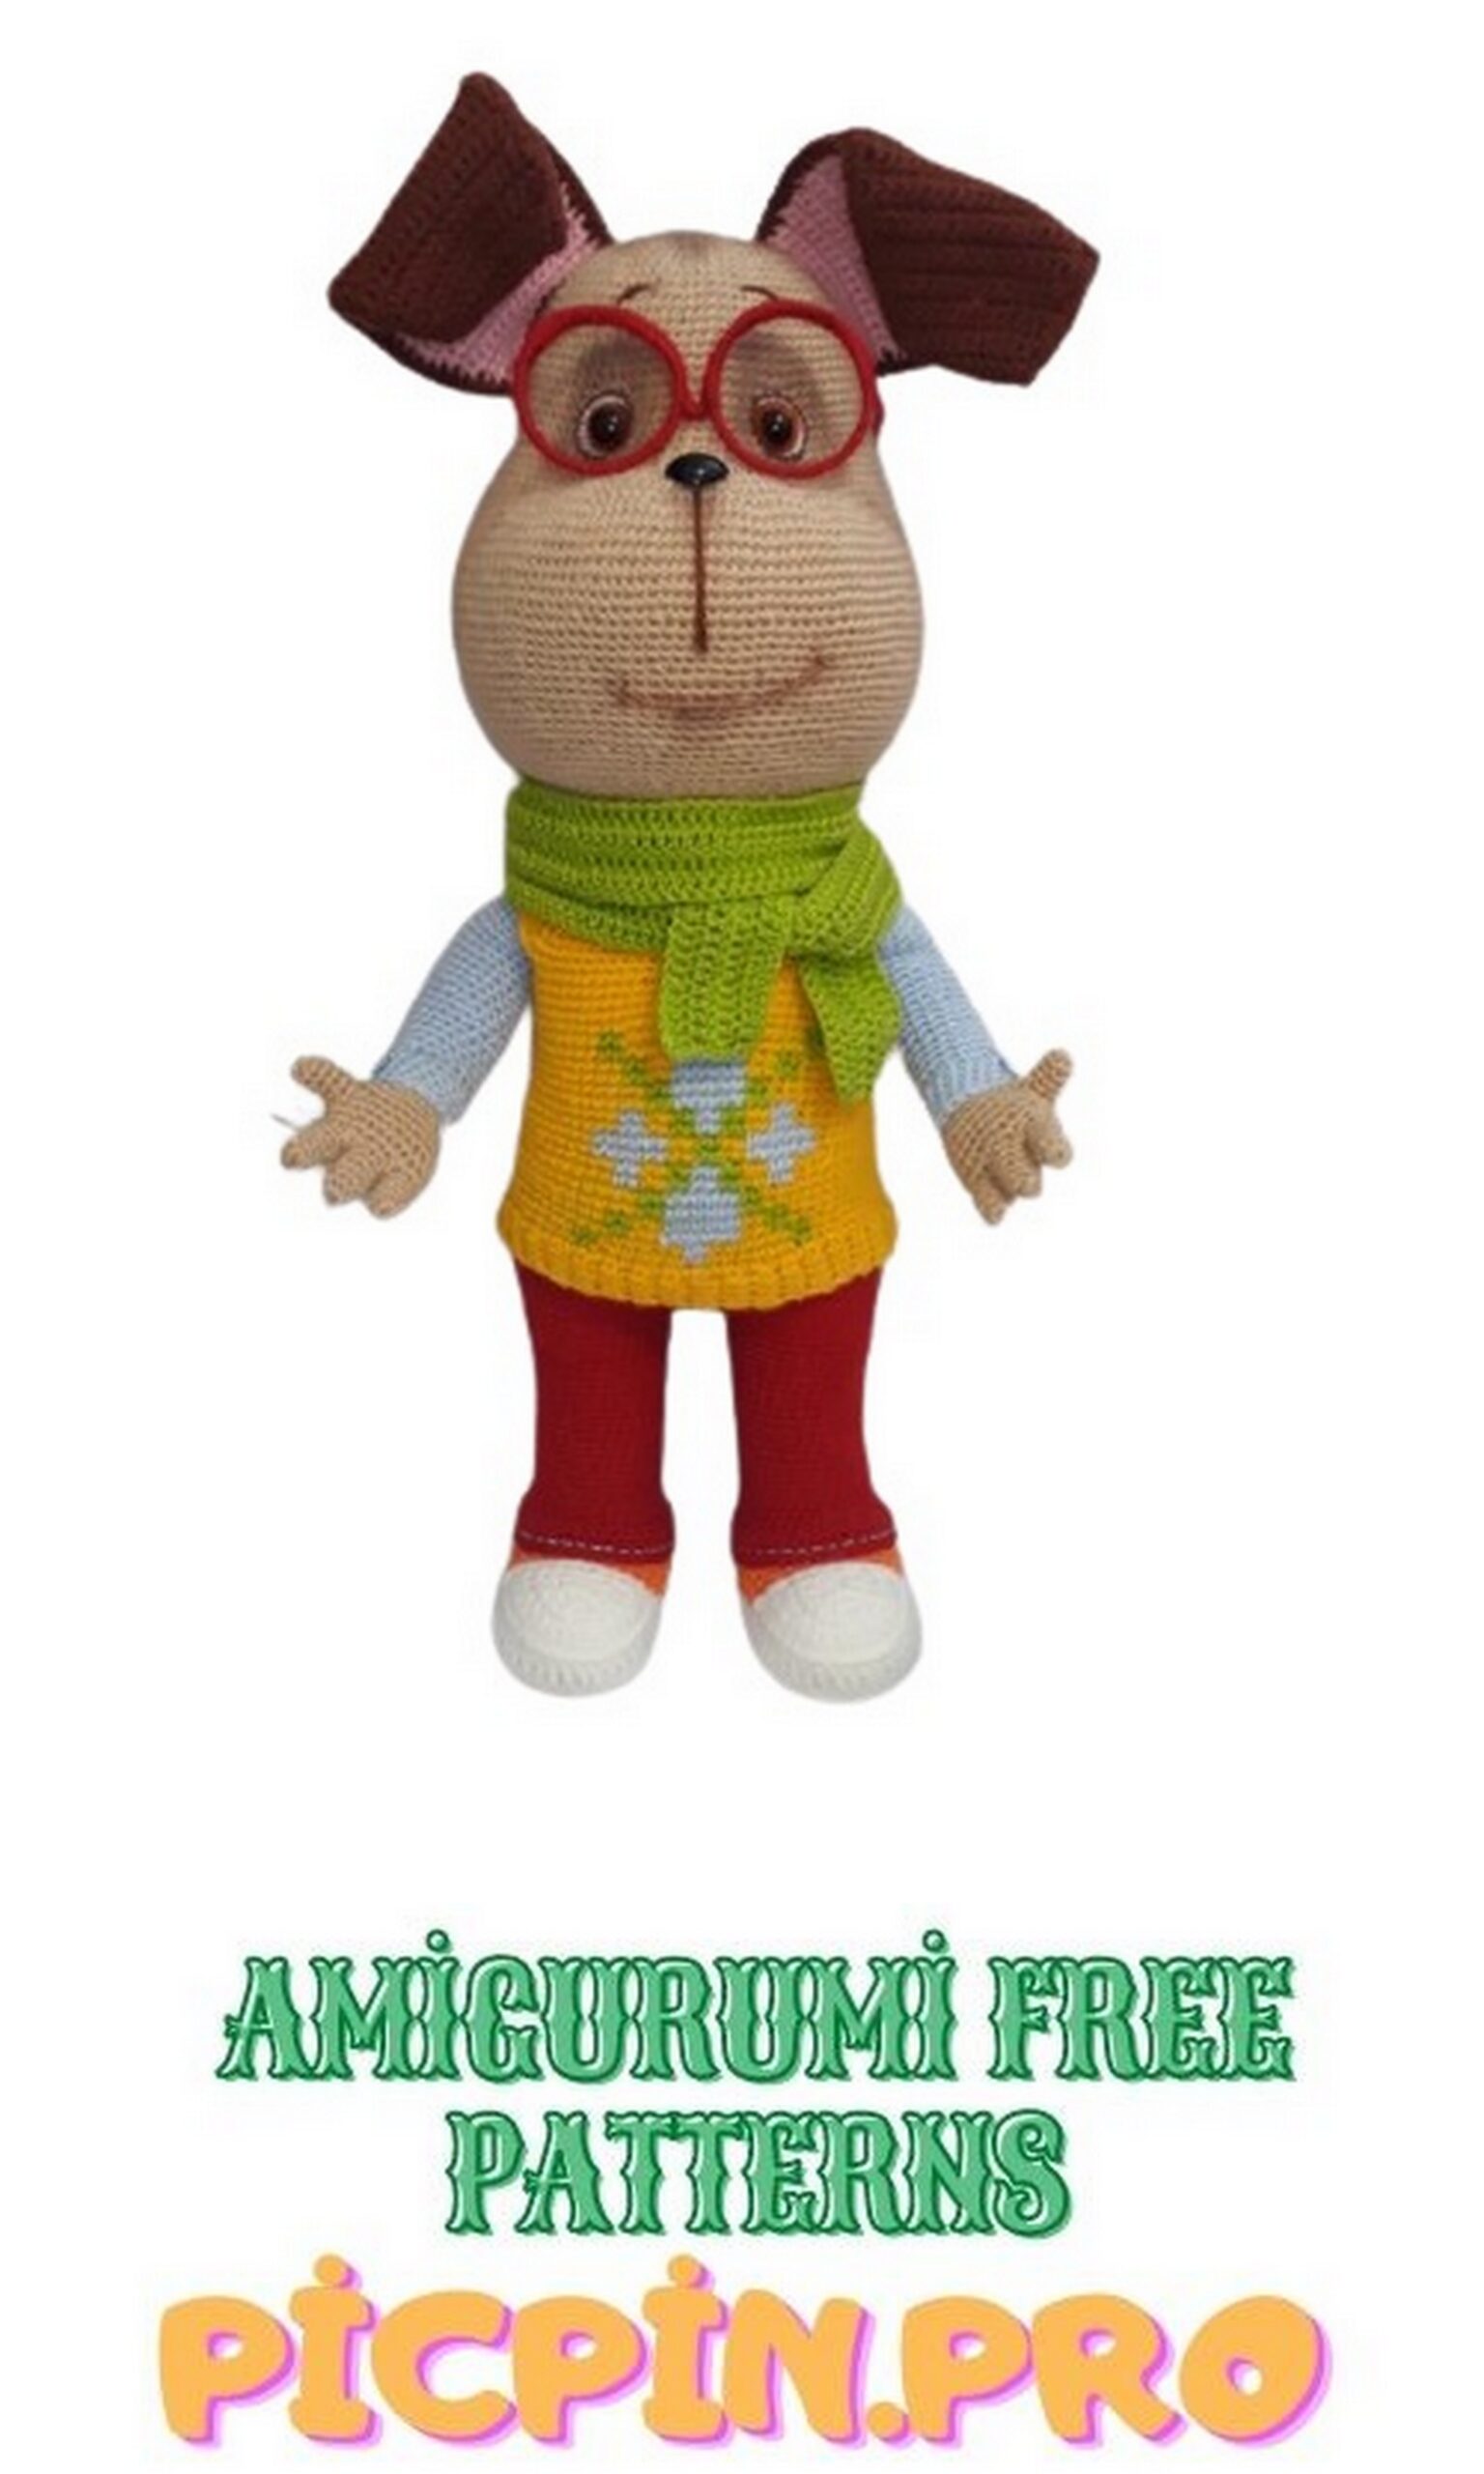
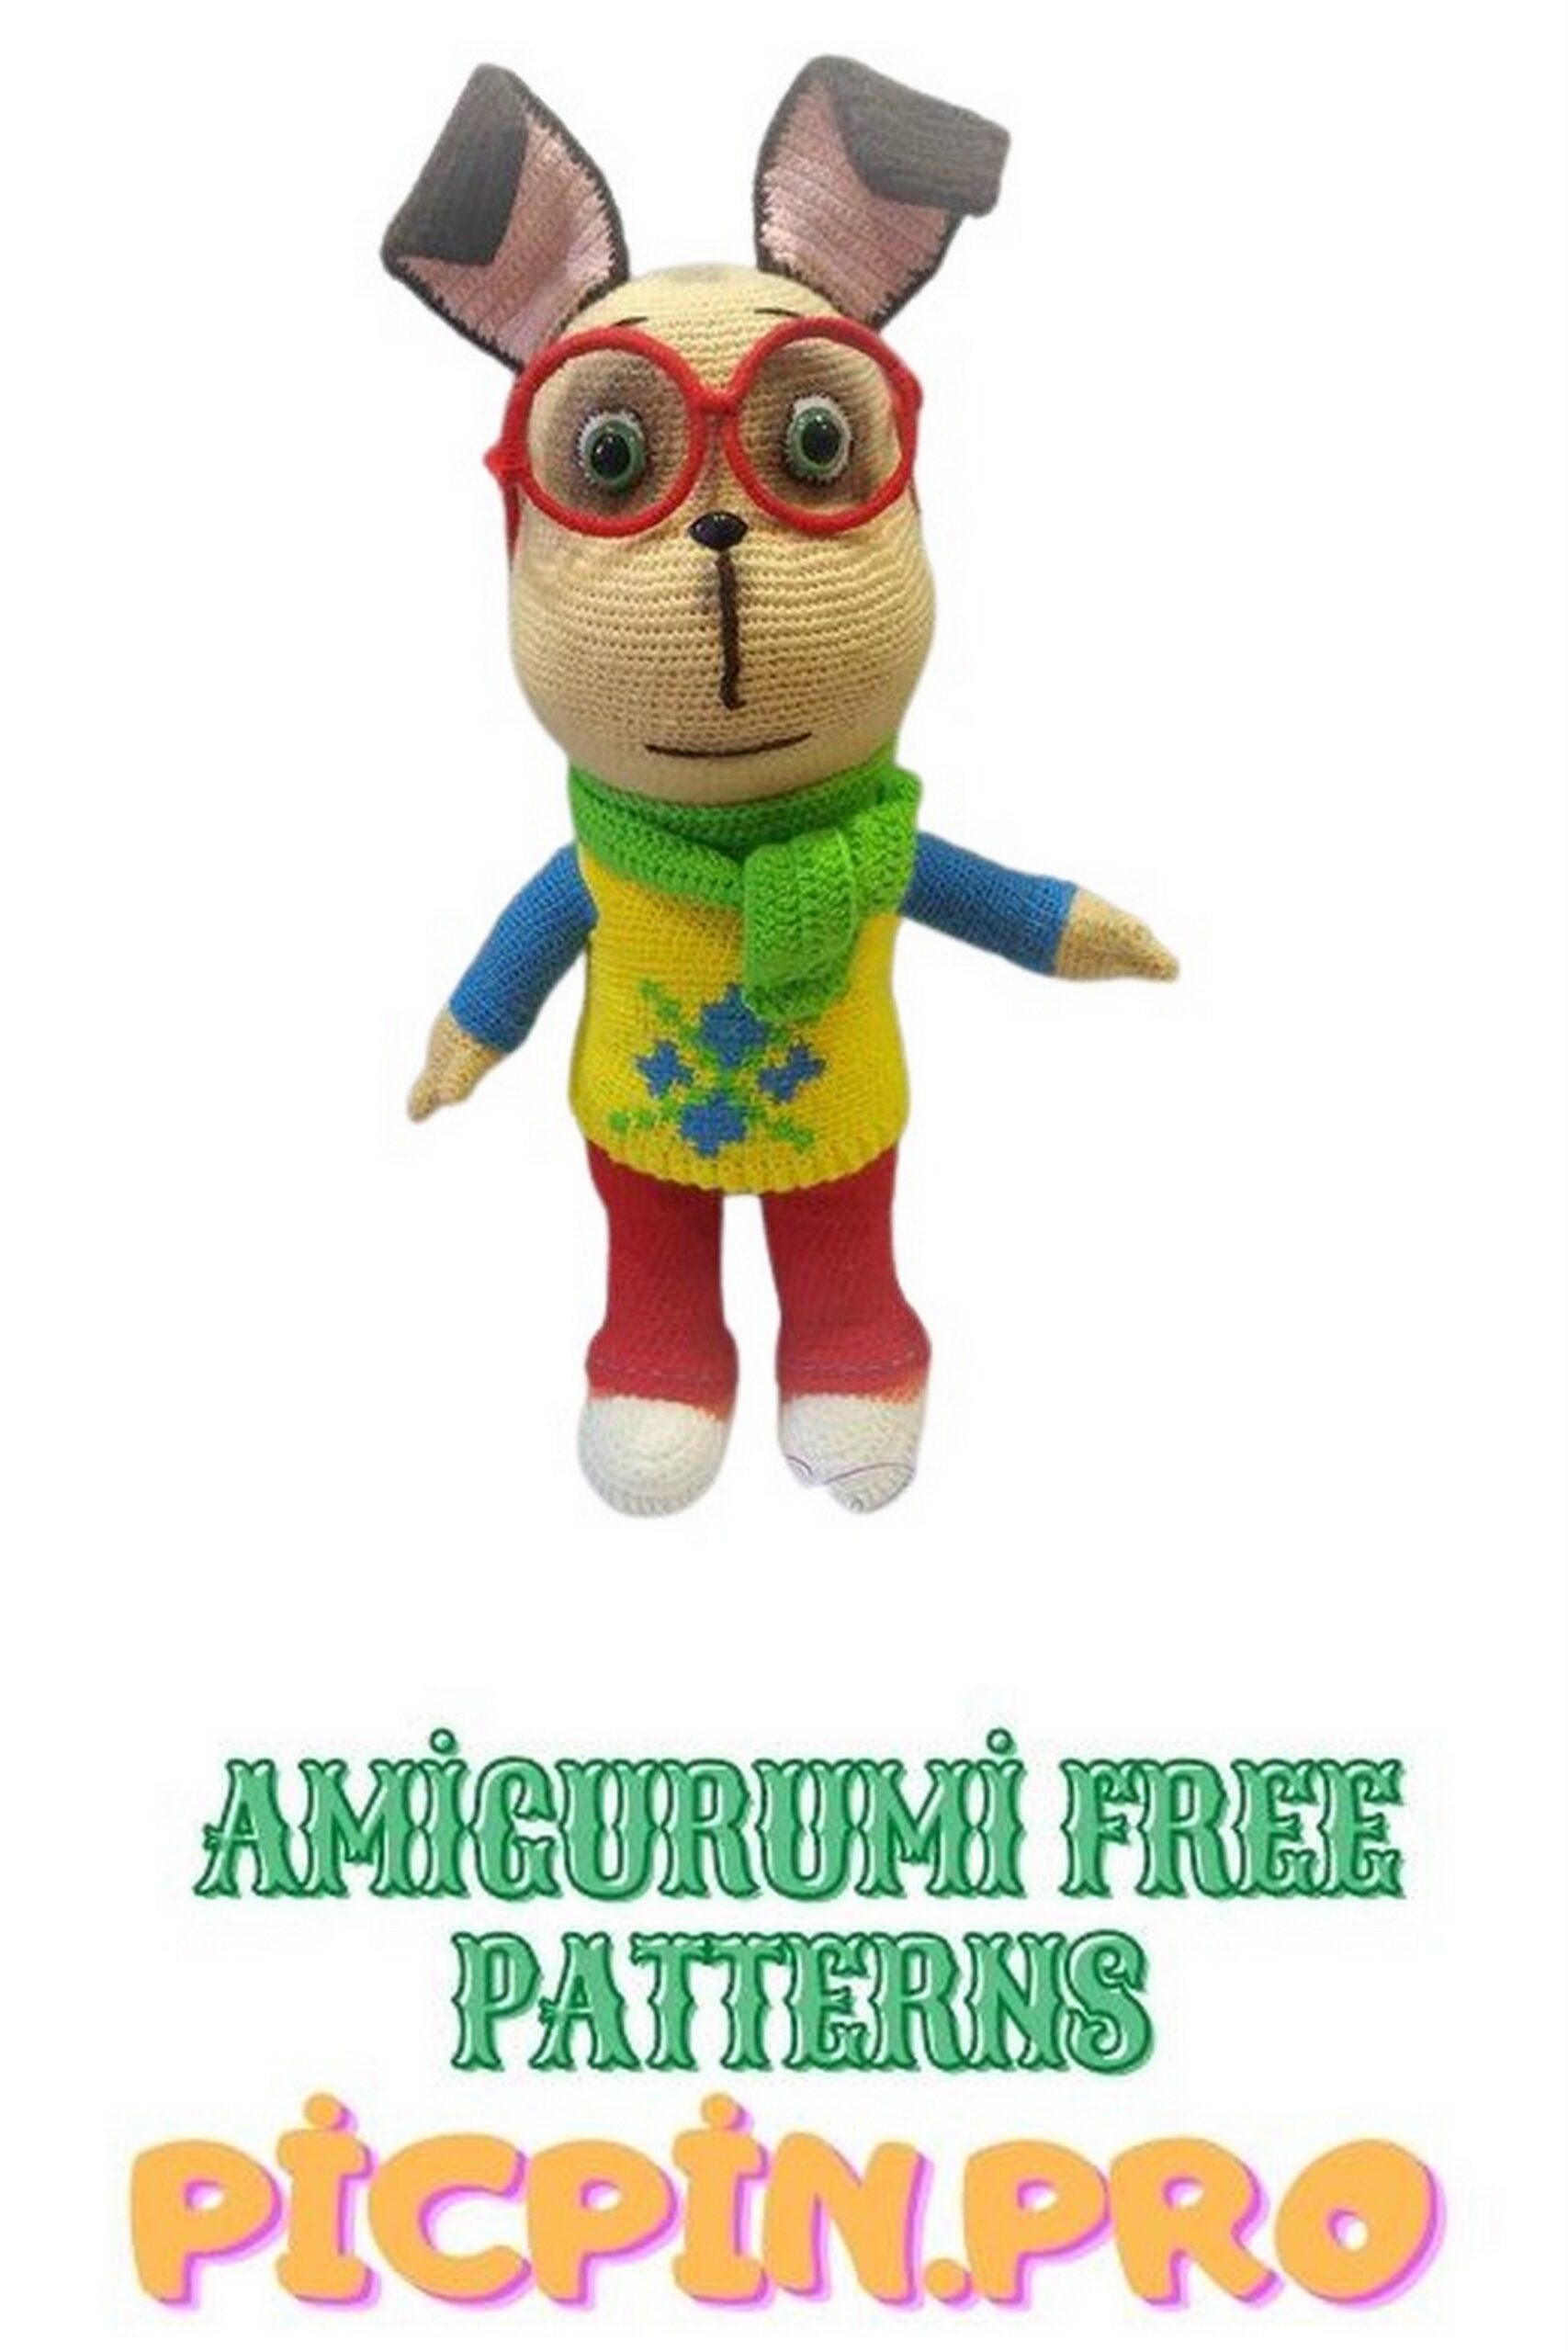
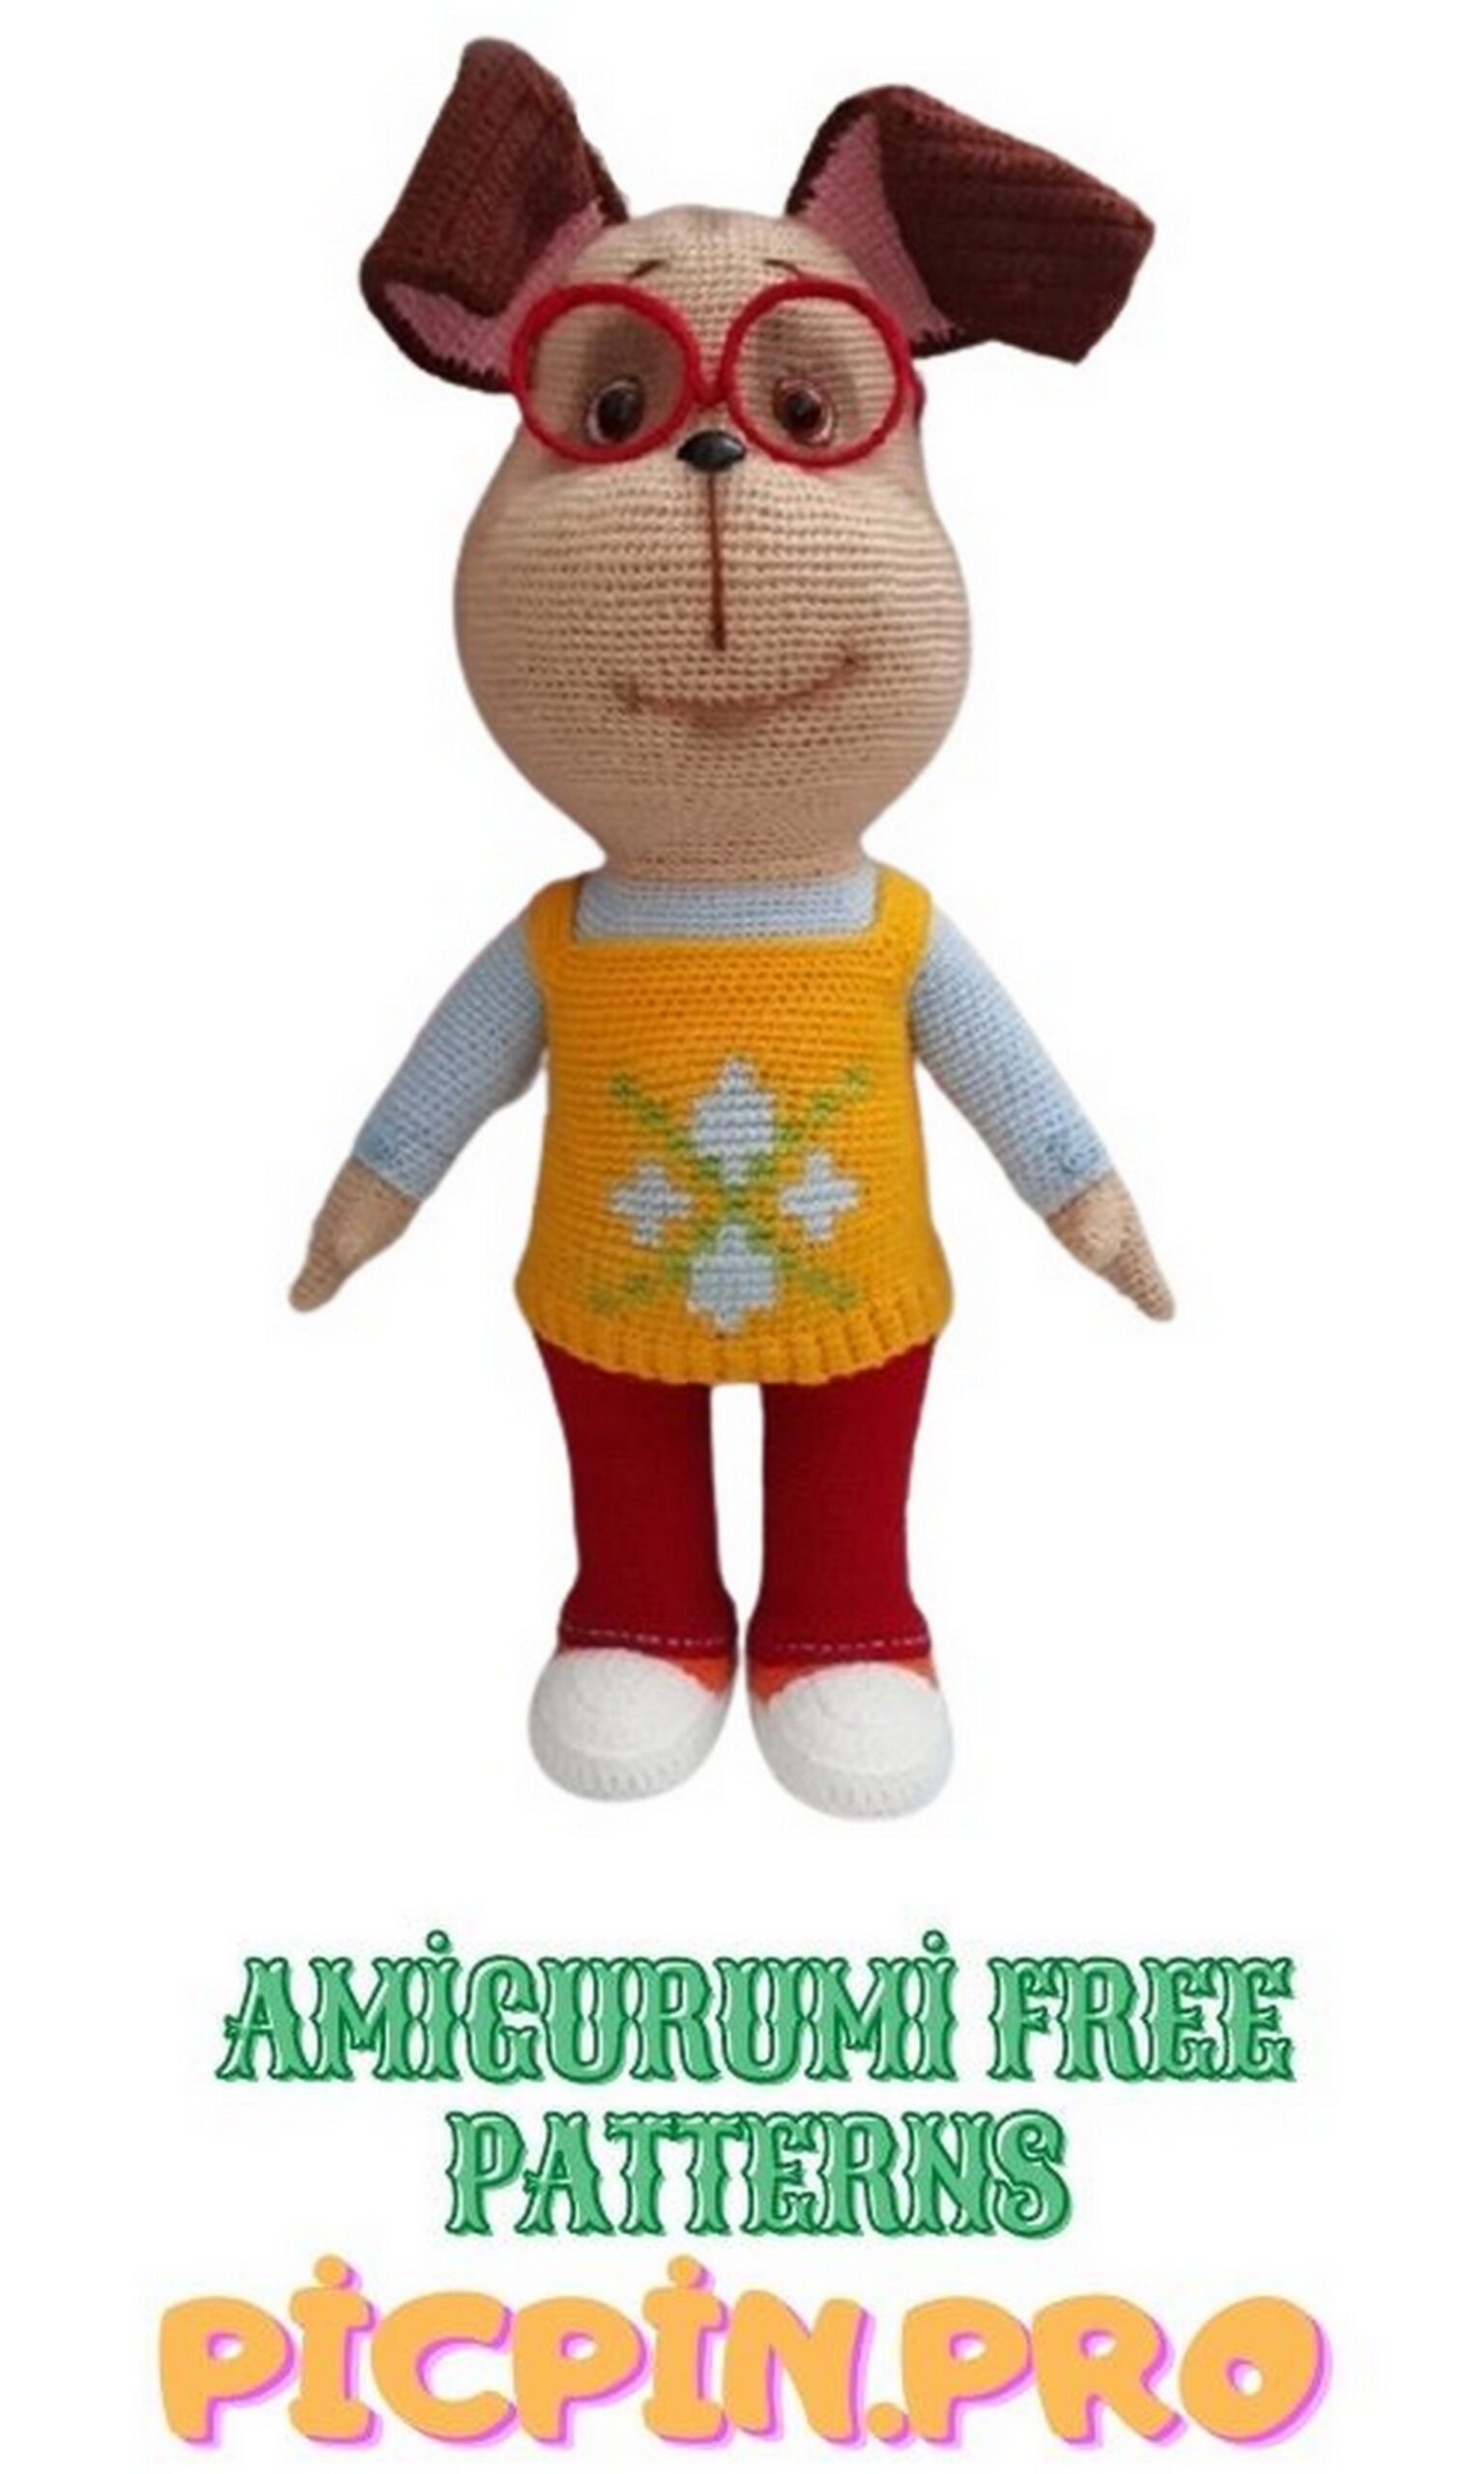
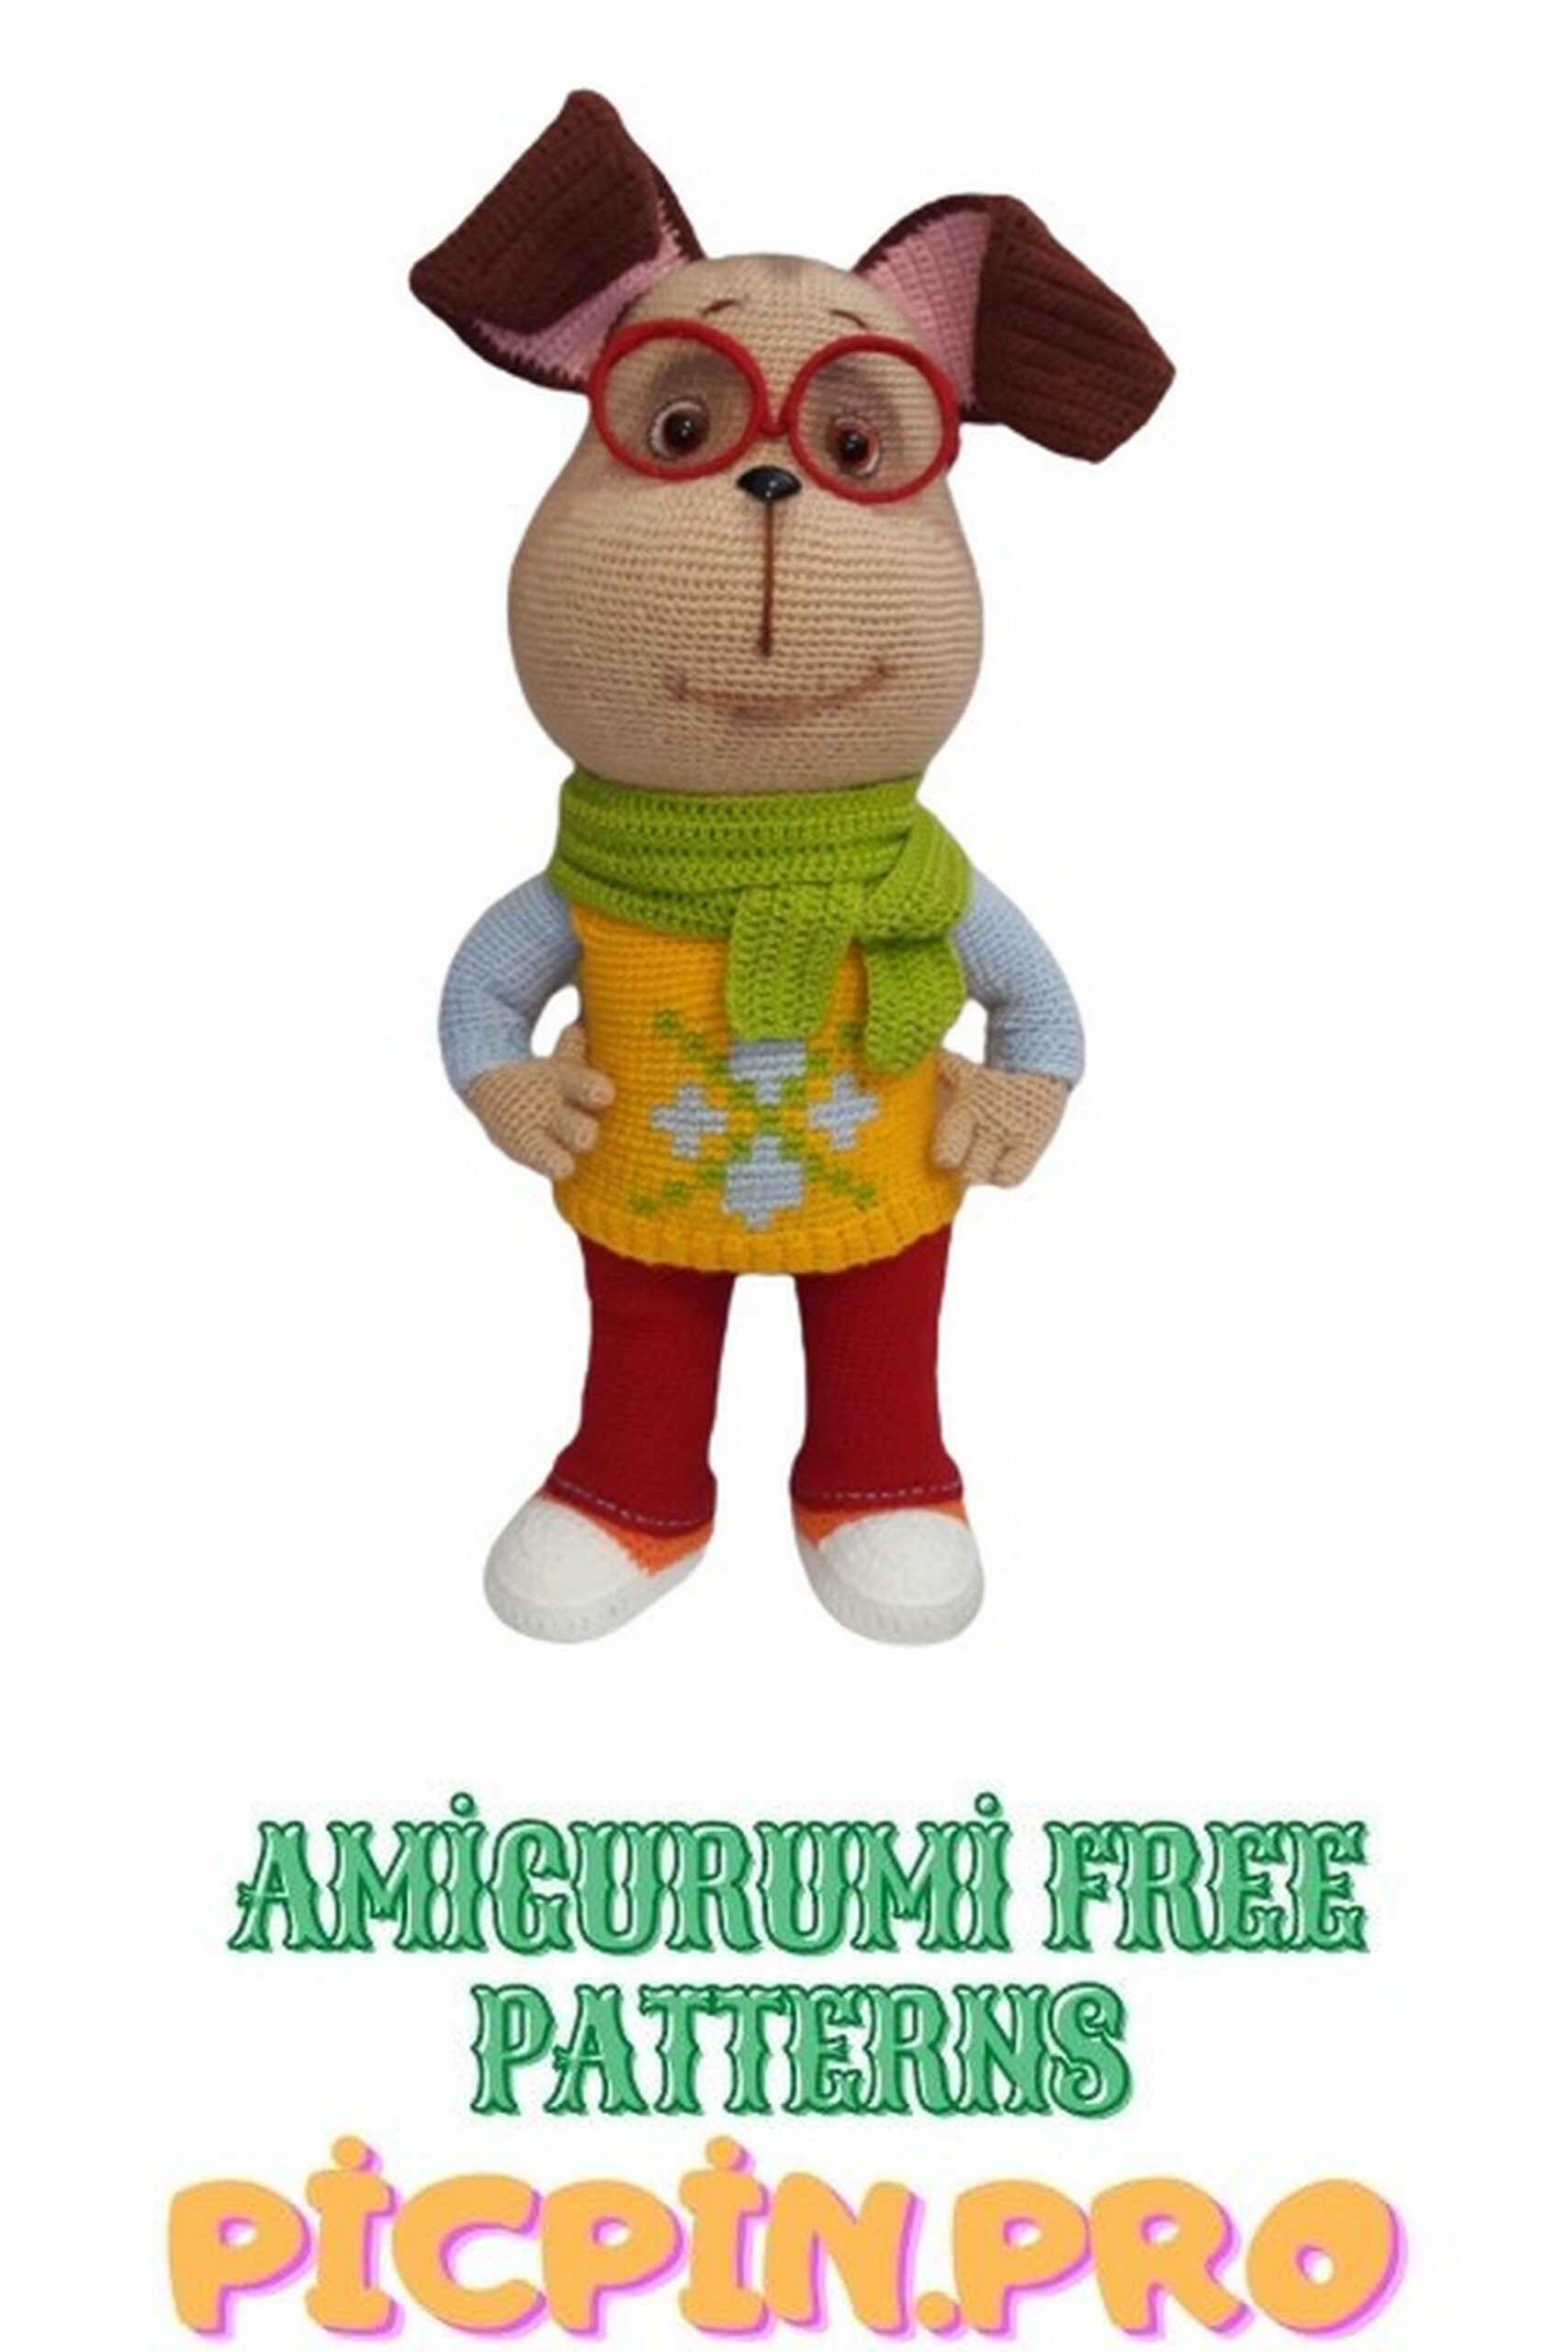
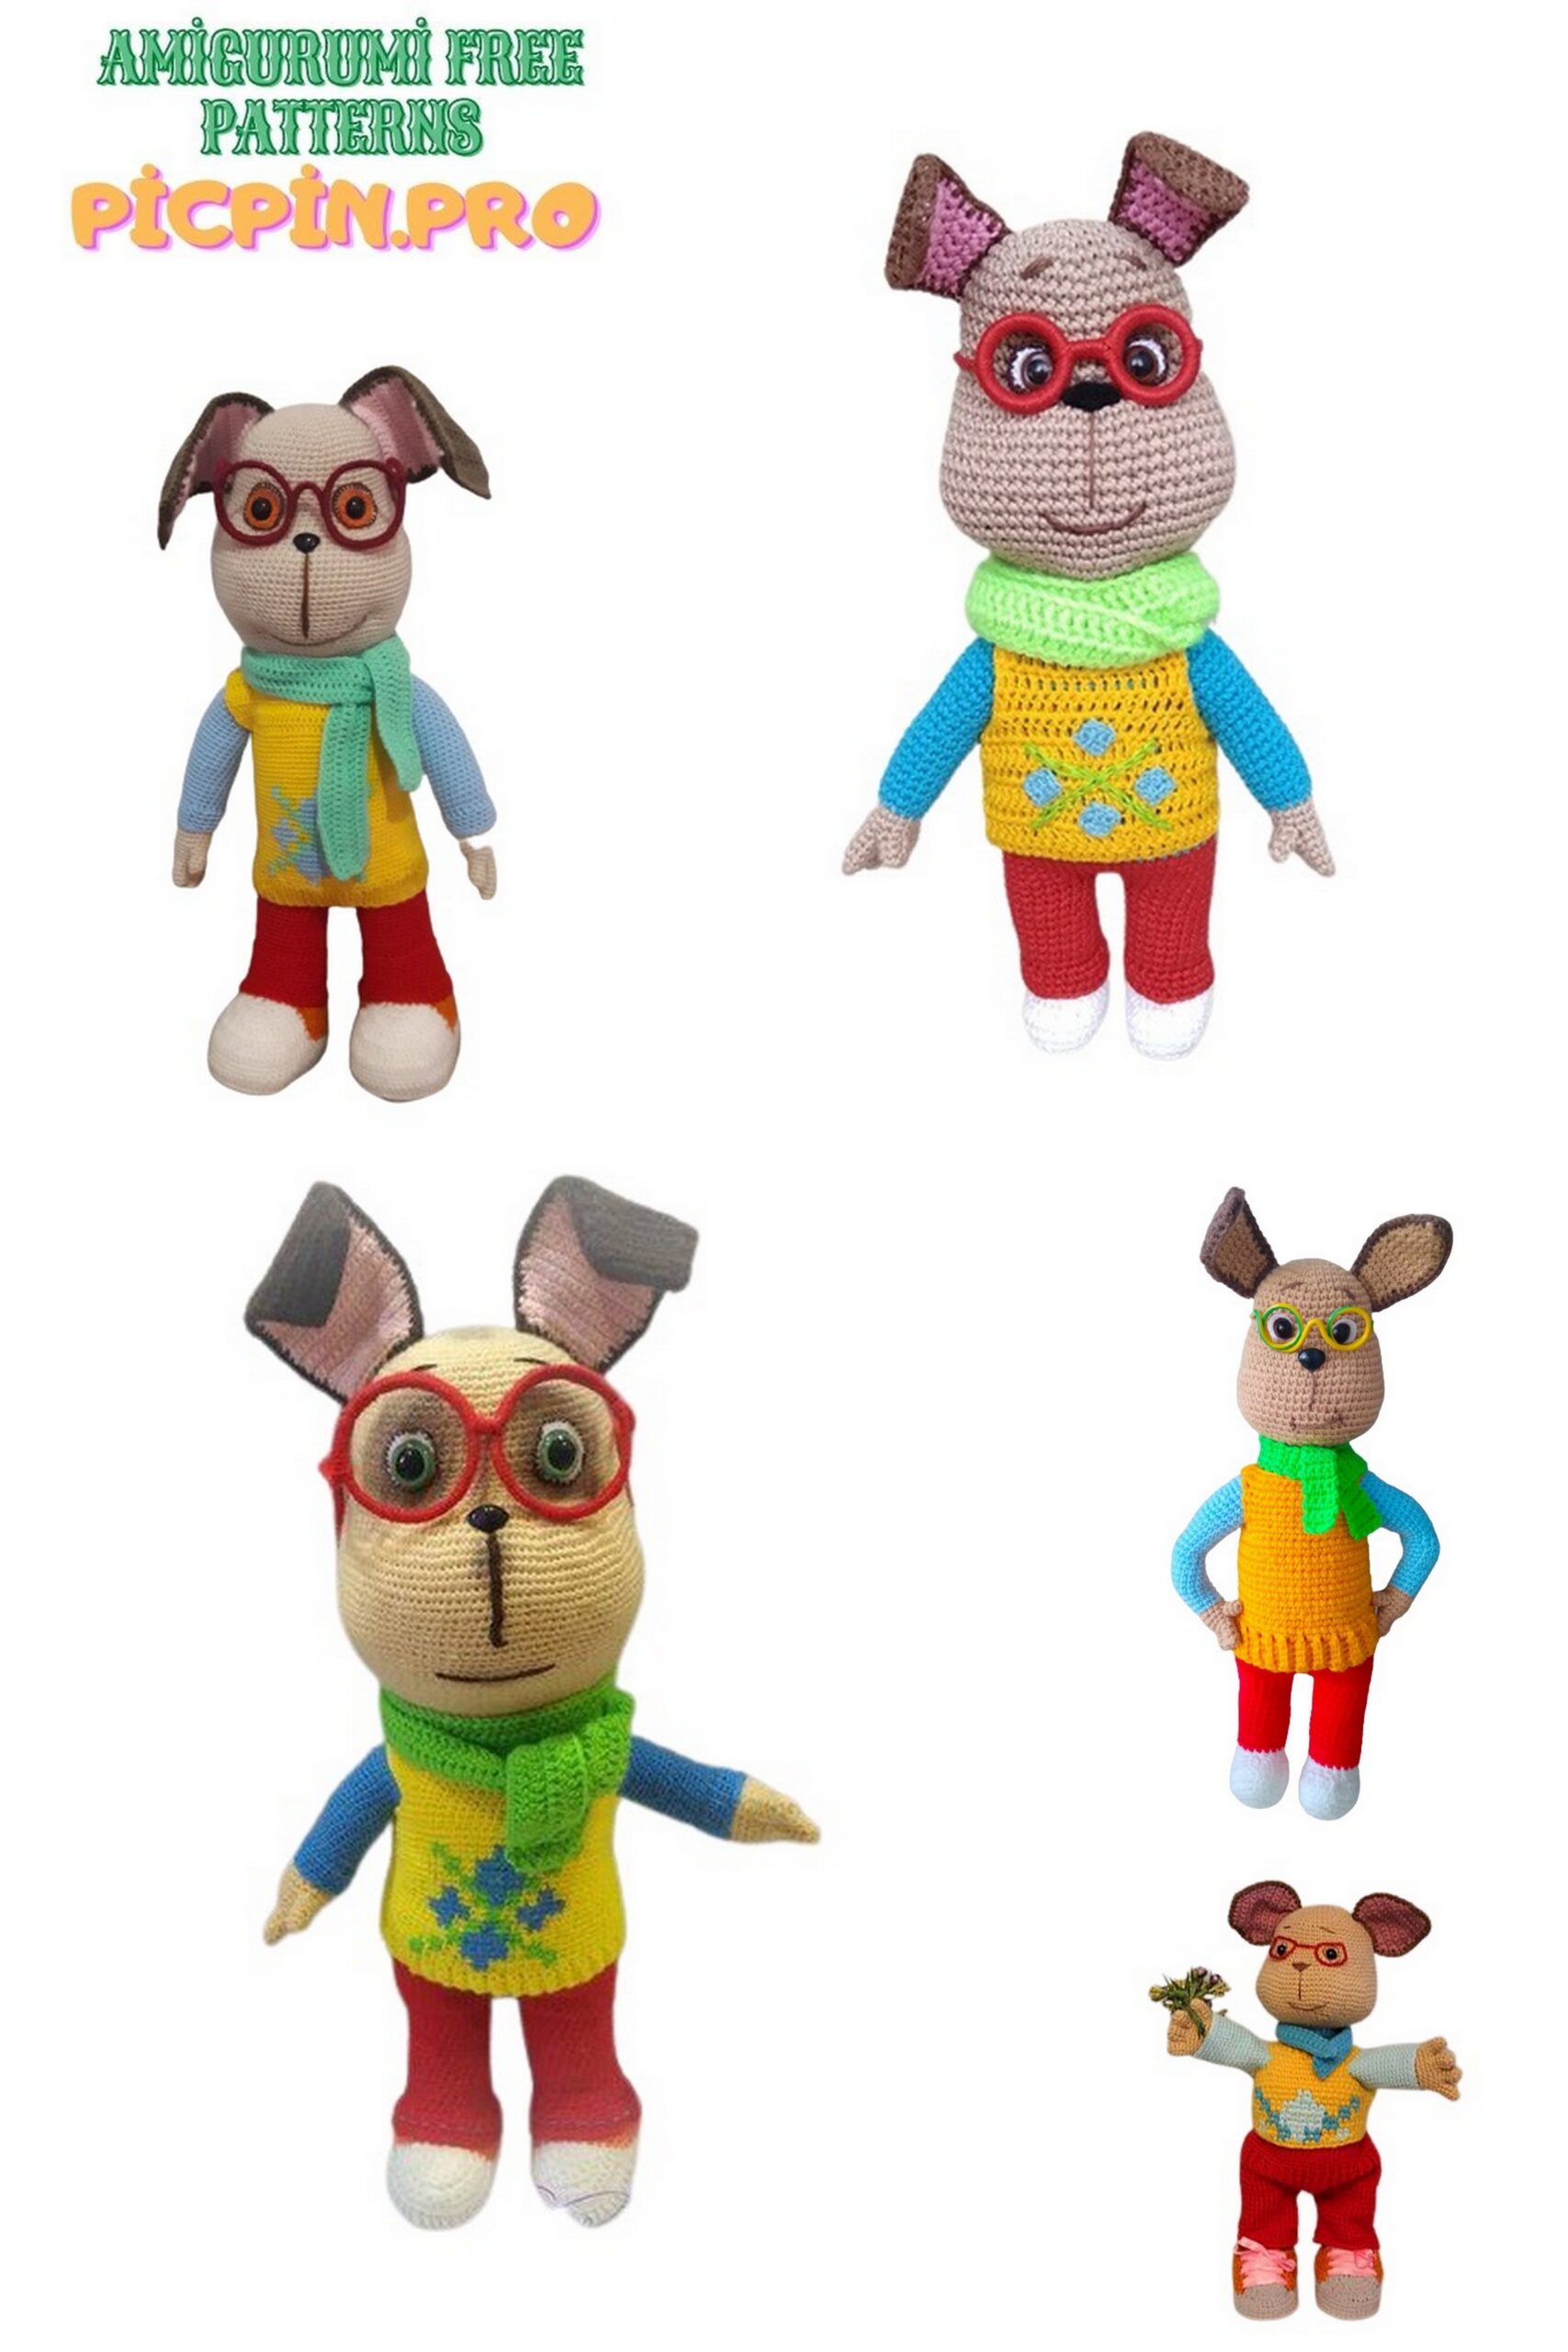
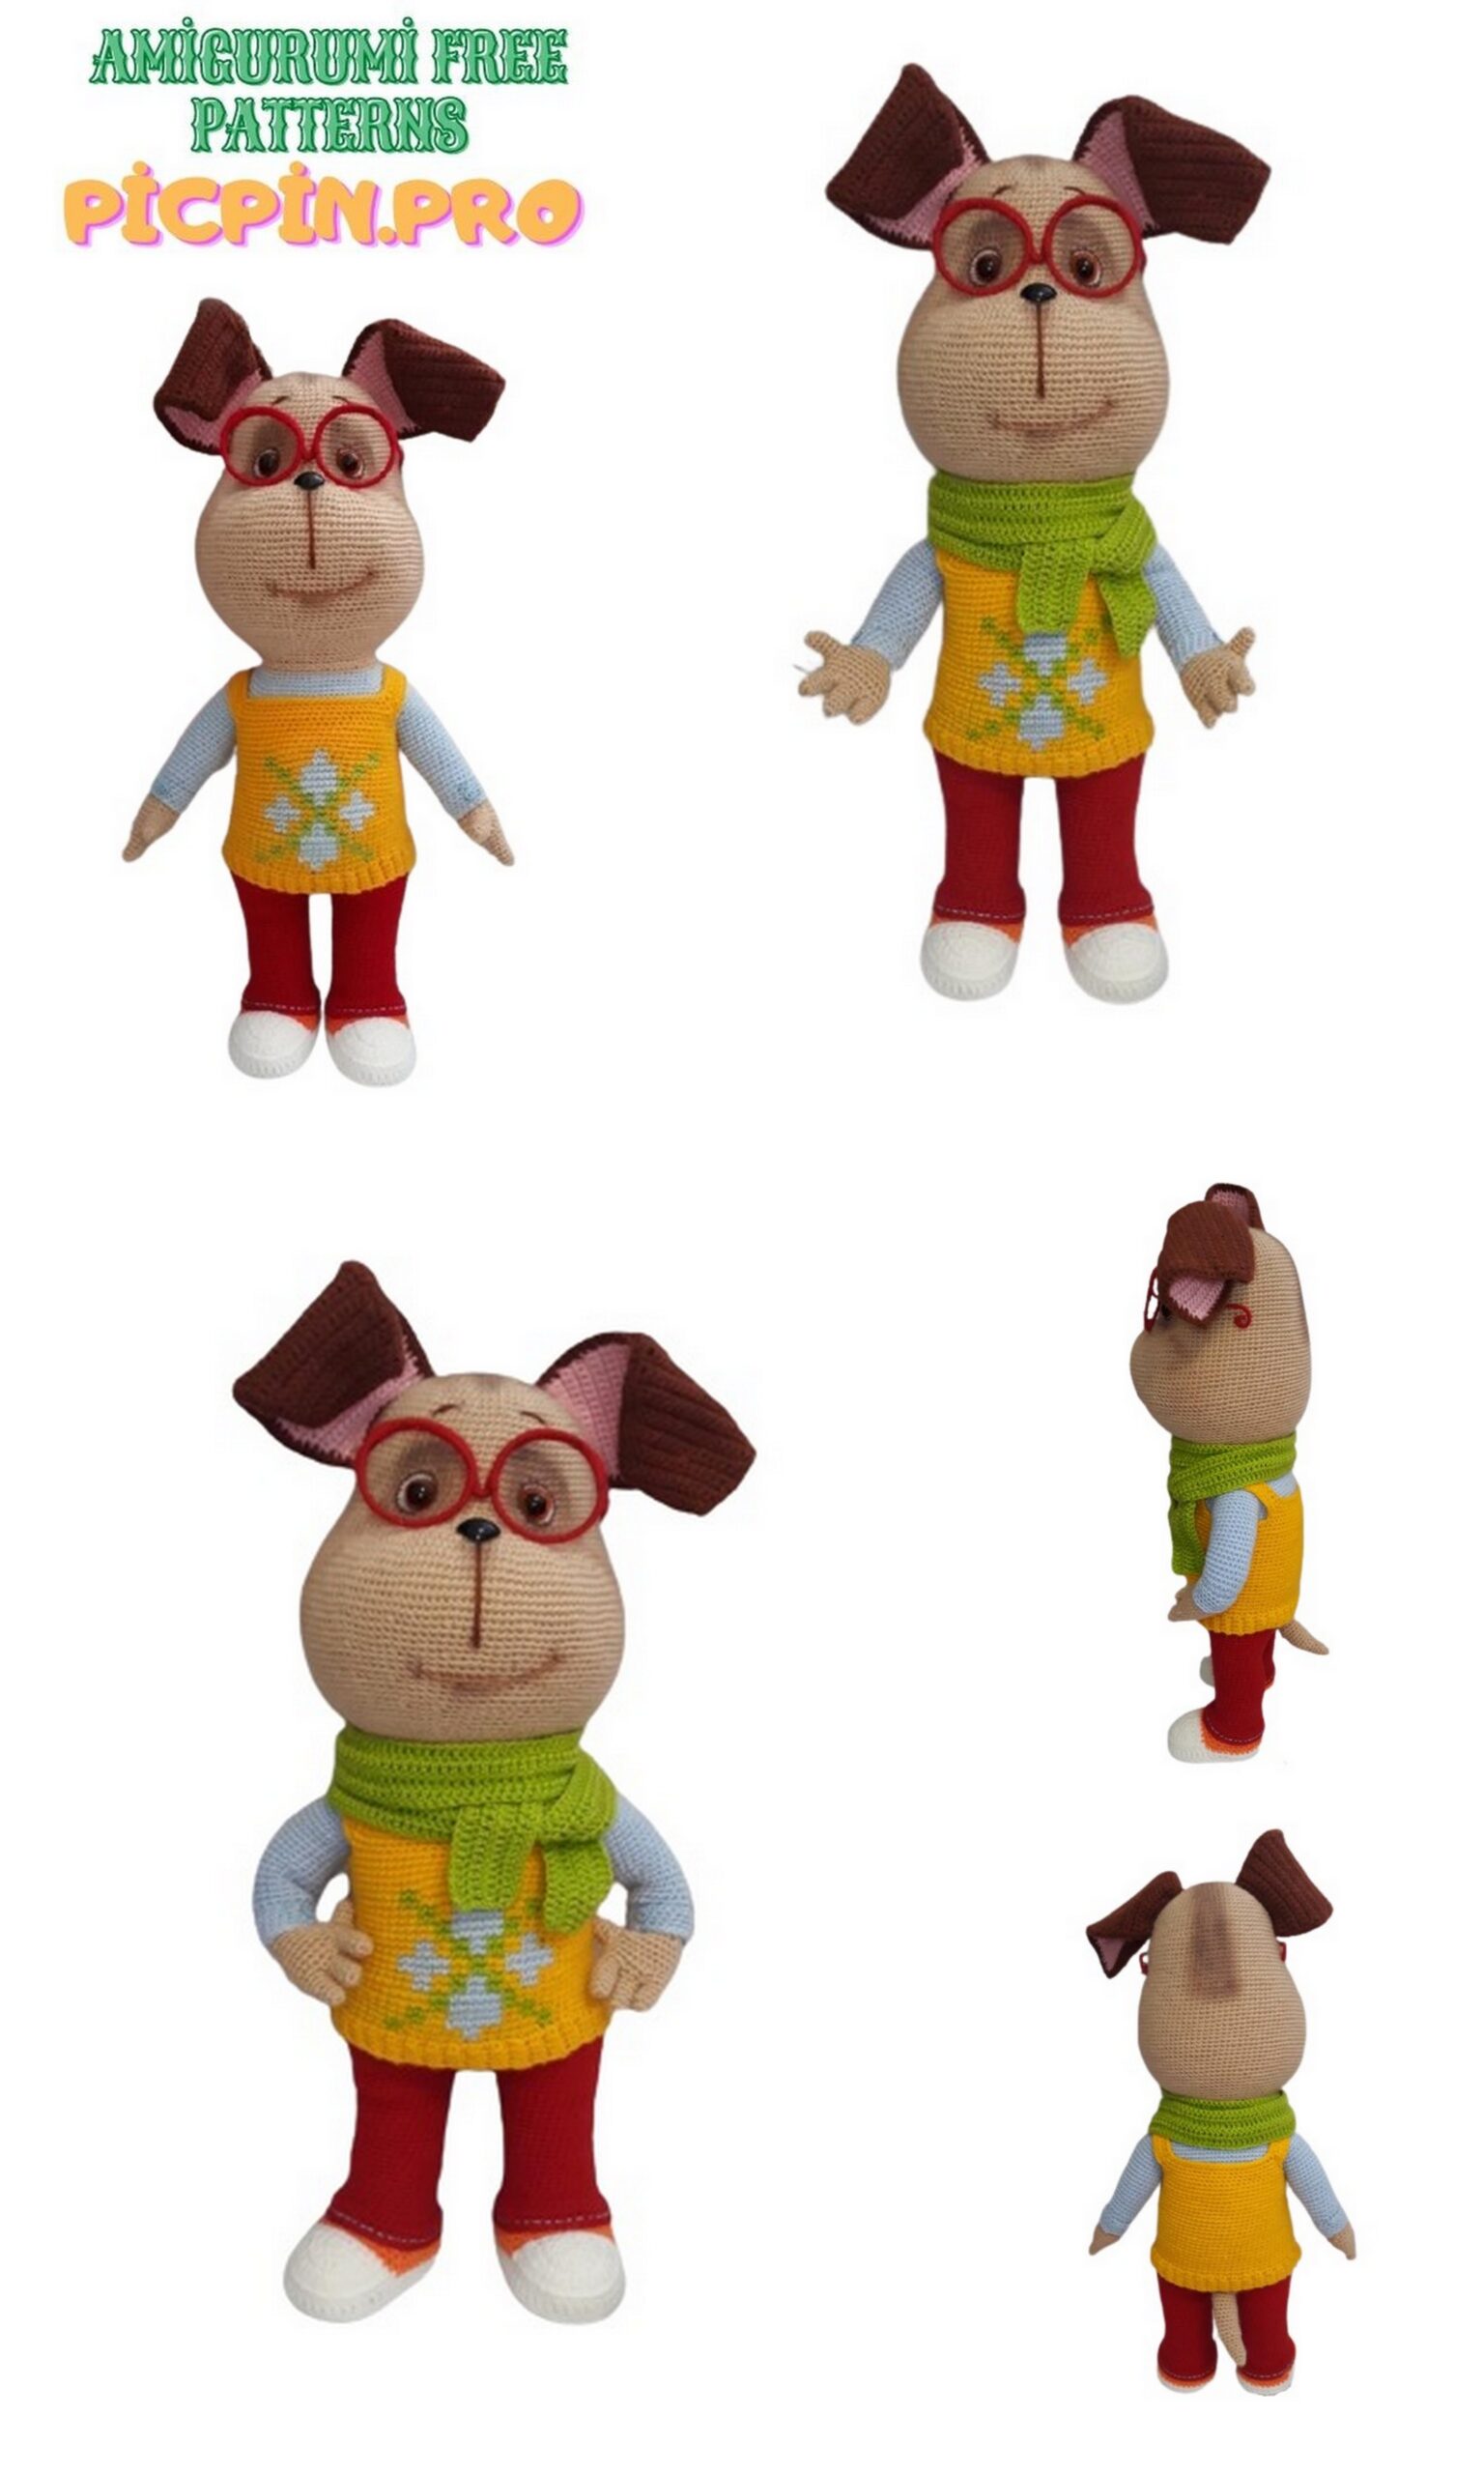
Mr. Dog Amigurumi Free Crochet Pattern
Pinterest Offical Page : Picpin.pro
Facebook Group: Amigurumi Free Patterns
Facebook Offical Page: Free Amigurumi Picpin
Legendary amigurumi animal patterns are available on this site for free. In this article, a wonderful amigurumi dog pattern is waiting for you.
Required materials and tools:
1) for the head and upper legs, Bambino Nako yarn (25% wool, 75% acrylic, 130m / 50g) light beige – 2 pcs .;
2) for panties yarn “Bambino” Kamtex (25% wool, 75% acrylic, 130m / 50g) red – 1 pc .;
3) for boots “Bambino” Kamtex yarn (25% wool, 75% acrylic, 130m / 50g) orange – 0.5 pcs;
4) for the sole yarn “Bambino” Kamtex (25% wool, 75% acrylic, 130m / 50g) white – a little;
5) for a shirt yarn “Bambino” Kamtex (25% wool, 75% acrylic, 130m / 50g) light blue – 2 pcs .;
6) for a vest yarn “Bambino” Kamtex (25% wool, 75% acrylic, 130m / 50g) yellow – 1 pc .;
7) for a scarf, “Bambino” Nako yarn (25% wool, 75% acrylic, 130m / 50g) of light green color – 0.5 pcs;
8) for the outer side of the ears yarn “Podmoskovnaya” from Troitsk (50% wool, 50% acrylic, 250m / 100g), color “cognac” – 0.5 pcs .;
9) for the inner side of the ears “Bambino” Kamtex yarn (25% wool, 75% acrylic, 130m / 50g) light pink – 0.5 pcs;
10) brown “Iris” thread for eyes – a little;
11) light blue “Iris” or “Mouline” threads – a little;
12) nylon thread or fishing line for tightening the muzzle – a little;
13) filler (holofiber, or synthetic winterizer, or synthetic fluff) – 300 gr.
14) aluminum (or copper) wire for weaving with a diameter of 2 mm for the frame – 3 – 4 m;
15) white felt for the eyes – a little;
16) eyes for dolls with a brown ray with a diameter of 16 mm – 1 pair;
17) plastic black spout 1.5 cm wide – 1 pc .;
18) transparent super-glue for attaching eyes and nose – a little;
19) blue buttons with a diameter of about 8 mm – 2 pcs.;
20) hook number 3;
21) a needle with a large eye;
22) scissors;
23) colored pins for marking;
24) white plastic or thick white cardboard for insoles – a little;
25) white adhesive plaster or electrical tape for wrapping the ends of the wire;
26) dry pastels or ordinary matte brown shades for toning.
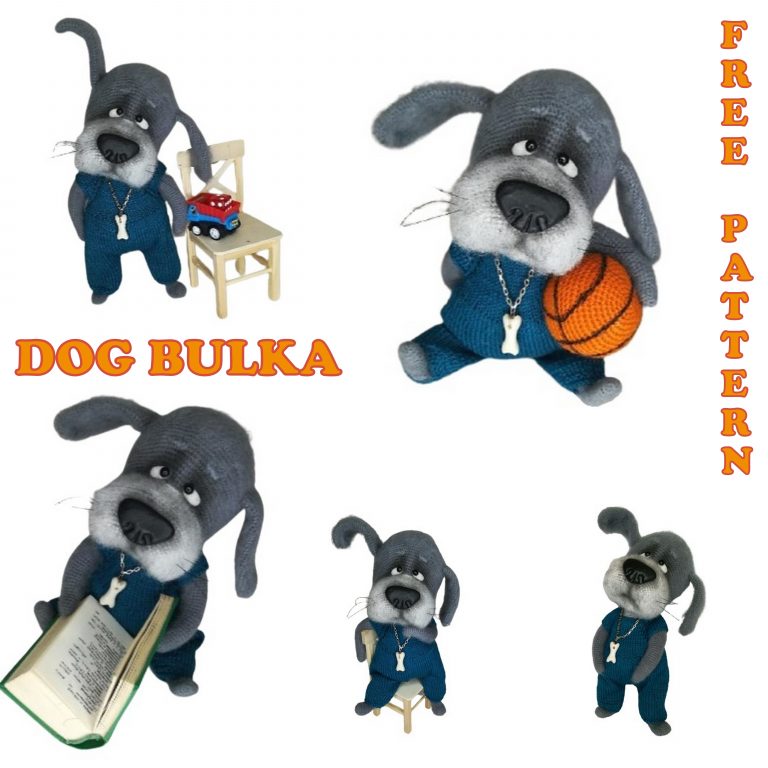
From the indicated materials, a toy is obtained with a size of 50 cm, excluding standing ears!
Knitting tips:
✓ Be sure to use a marker at the beginning of each row to help mark the first stitch of the new row.
✓ Knit tightly enough, the aesthetic appearance of the toy will ultimately depend on this.
With loose (loose) knitting, holes will glow after stuffing.
✓ Stuff the toy tightly so that it does not lose its shape, but try not to stretch the canvas. Spend more time packing, try to keep the details filled like the ones shown by me. The final result and the appearance of the toy strongly depend on the correct filling.
Abbrevations:
CH – air loop;
SC – single crochet;
INC – single crochet increase;
DEC – single crochet decrease;
DC – double crochet;
INCDC – increase in a column with a crochet;
DECDC – Decrease of the double crochet;
HDC – half double crochet;
DECHDC – double crochet decrease;
SL-ST – connecting post;
BLO – back half loop;
FLO – front half loop.
Stage 1. Head.
We knit in a spiral with light beige threads.
1st row: 6 SC into magic ring (6)
2nd row: 6 INC (12)
3 row: (SC, INC) * 6 (18)
4th row: SC, INC, (2 SC, INC) * 5, SC (24)
5 row: (3 SC, INC) * 6 (30)
6 row: 2 SC, INC, (4 SC, INC) * 5, 2 SC (36)
7 row: (5 SC, INC) * 6 (42)
8 row: 3 SC, INC, (6 SC, INC) * 5, 3 SC (48)
9 row: (7 SC, INC) * 6 (54)
10 row: 4 SC, INC, (8 SC, INC) * 5, 4 SC (60)
11 row: (9 SC, INC) * 6 (66)
12th row: 5 SC, INC, (10 SC, INC) * 5, 5 SC (72)
13 row: (11 SC, INC) * 6 (78)
14-20 row (7 rows): 78 SC (78)
21 row: 6 SC, INC, (12 SC, INC) * 5, 6 SC (84)
22 – 28 row (7 rows): 84 SC (84)
29 row: 35 SC, (SC, INC) * 3, 2SC, (SC, INC) * 3, 35 SC (90)
30 row: 35 SC, (2 SC, INC) * 3, 2SC, (2 SC, INC) * 3, 35 SC (96)
31 row: 35 SC, (3 SC, INC) * 3, 2SC, (3 SC, INC) * 3, 35 SC (102)
32 row: 35 SC, (4 SC, INC) * 3, 2SC, (4 SC, INC) * 3, 35 SC (108)
33 row: 35 SC, (5 SC, INC) * 3, 2SC, (5 SC, INC) * 3, 35 SC (114)
34 – 39 row (6 rows): 114 SC (114)
40 row: 35 SC, (5 SC, DEC) * 3, 2SC, (5 SC, DEC) * 3, 35 SC (108)
41 – 43 row (3 rows): 108 SC (108)
44 row: 35 SC, (4 SC, DEC) * 3, 2SC, (4 SC, DEC) * 3, 35 SC (102)
45 – 47 row (3 rows): 102 SC (102)
48 row: 35 SC, (3 SC, DEC) * 3, 2SC, (3 SC, DEC) * 3, 35 SC (96)
49 – 51 rows (3 rows): 96 SC (96)
52 row: 35 SC, (2 SC, DEC) * 3, 2SC, (2 SC, DEC) * 3, 35 SC (90)
53 – 55 row (3 rows): 90 SC (90)
56 row: 35 SC, (1 SC, DEC) * 3, 2SC, (1 SC, DEC) * 3, 35 SC (84)
57 row: 6 SC, DEC, (12 SC, DEC) * 5, 6 SC (78)
58-60 row (3 rows): 78 SC (78)
Row 61: (11 SC, DEC) * 6 (72)
62 – 64 row (3 rows): 72 SC (72)
65 row: 5 SC, DEC, (10 SC, DEC) * 5, 5 SC (66)
66 – 68 row (3 rows): 66 SC (66)
We fix the thread, cut it off. We fill our head with filler.
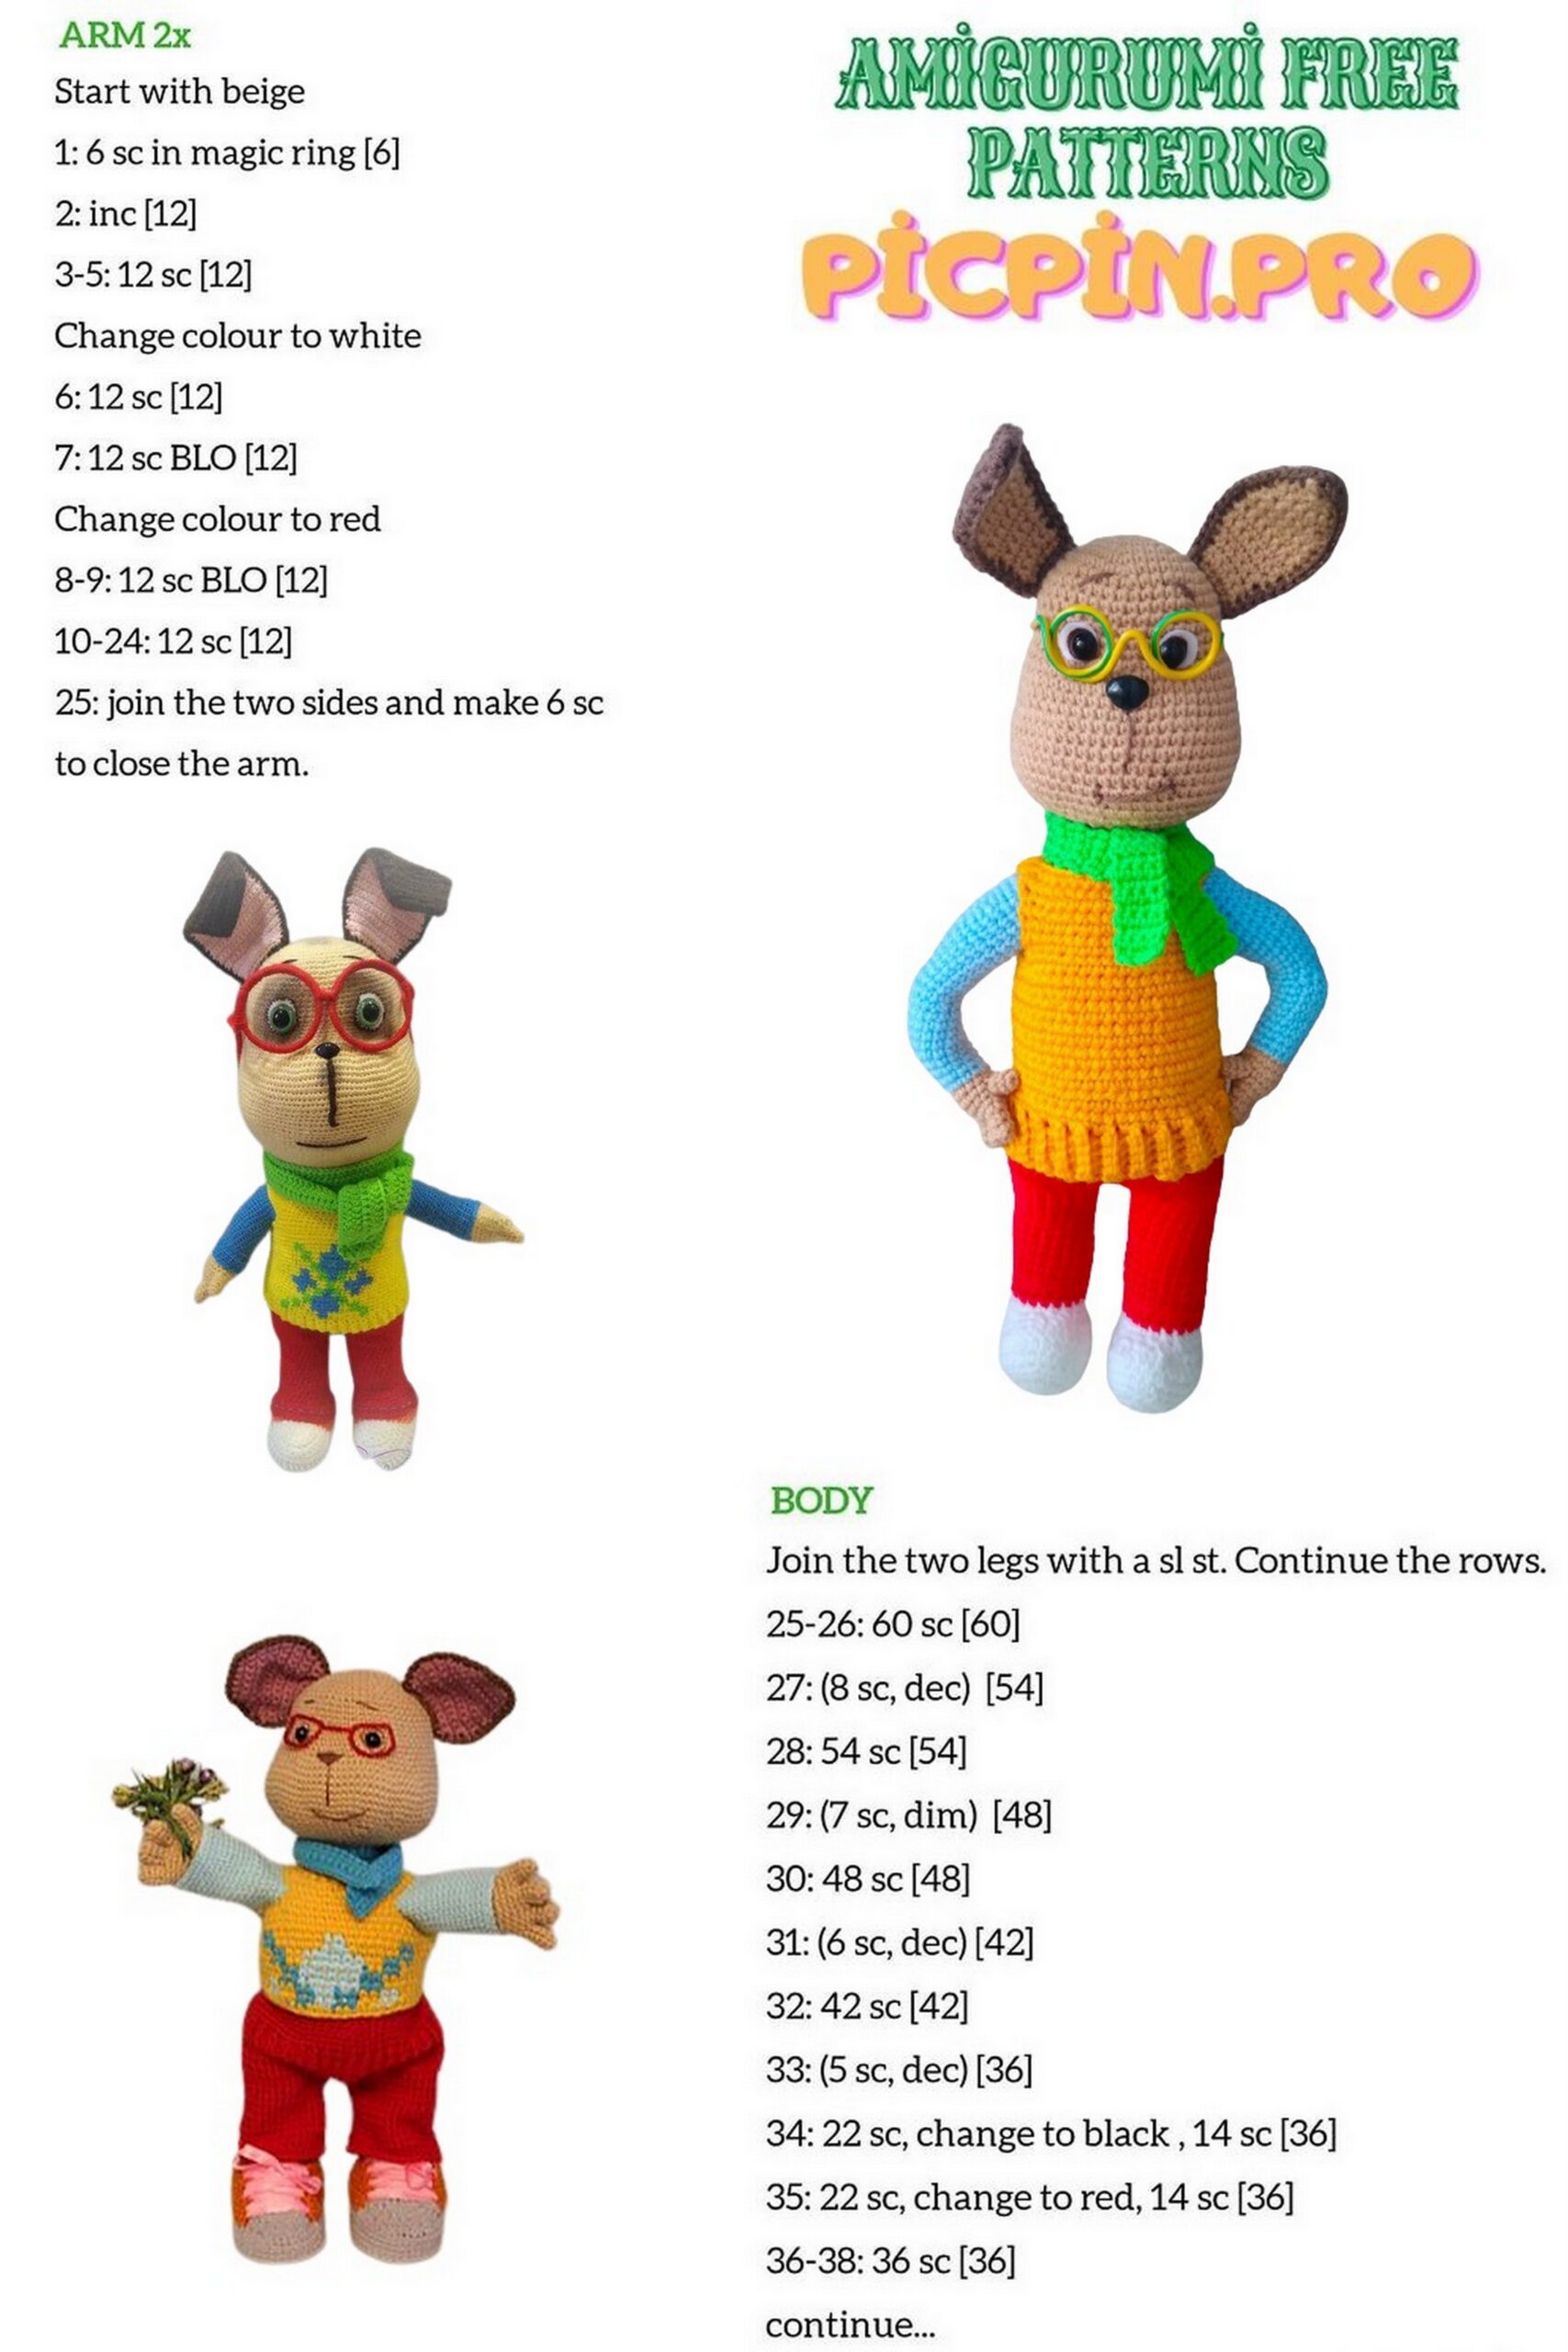
Stage 2. Hands.
First, knit the fingers with light beige threads. Each hand has 4 fingers (thumb, forefinger, middle and little finger). For the left and right hand, the fingers are knitted the same way.
Thumb and pinky.
1st row: 7 SC into magic ring (7)
2 – 5 row (4 rows): 7 SC (7)
We fix and cut the thread.
Index finger and middle finger.
1st row: 7 SC into magic ring (7)
2 – 6 rows (5 rows): 7 SC (7)
We fasten and cut the thread on one finger, and leave the thread on the second finger, continue to connect the fingers into the palm.
Right hand:
Row 1: 6 SC on the pinky, SC on the pinky and SC on the middle finger together DEC, 3 SC on the middle finger, SC on the middle finger and SC on the index finger together DEC, 5 SC on the index finger, SC on the index finger and SC on the middle finger together DEC, SC on the middle finger (18)
Important! The marker for the beginning of the row runs down the middle of the back of the hand. Make sure that the marker does not move out during knitting, if necessary, knit offset loops.
2nd row: SC, INC, (2 SC, INC) * 5, SC (24)
3rd row: 24 SC (24)
In the next row we tie the thumb.
4th row: 17 SC in the palm, 3 SC together with the thumb (simultaneously grab SC of the palm and SC of the thumb), 4 SC in the palm (24)
5 row: 17 SC in the palm, 4 SC in the thumb, 4 SC in the palm (25)
6 row: 25 SC (25)
7 row: (2 SC, DEC) * 6, SC (19)
8 row: 4 SC, DEC, 8 SC, DEC, 3 SC (17)
Important! Decreases in the 8th row are in the middle of the ribs of the palm above and below. If necessary, knit offset loops.
We fill the fingers and palm with filler.
We tie it up to the middle of the lower edge of the palm, transfer the marker here.
Change the thread to light blue.
9 row: 17 SC (17)
10 row: INC, 7 SC, INC, 8 SC (19)
Important! Increases in the 10th row are in the middle of the ribs of the palm above and below. If necessary, knit offset loops.
11 – 12 row (2 rows): 19 SC (19)
Row 13: for BLO INC, 9 SC, INC, 8 SC (21)
14 – 20 row (7 rows): 21 SC (21)
Row 21: 2 INC, 9 SC, INC, 9 SC (24)
Note: 2 INC forms a cubot.
Cut off 40 cm of wire. At the end we make a small loop, twist, insulate the twisted ends with adhesive tape or tape. We make two such blanks.
We insert the wire blank into the handle. We fill the handle with filler.
22 – 29 row (8 rows): 24 SC (24)
We fix the thread, cut it off. We fill the handle to the end.
We turn the handle in the direction of the palm away from ourselves.
We attach a light blue thread to the first half-loop of the 13th row left where we knitted for BLO, and knit the cuffs of the sleeves of the shirt.
1 – 5 row (5 rows): 19 SC (19)
We fix the thread, cut it off, hide the ends.
Sew a blue button 8 mm in diameter on top of the cuff.
Left hand:
1st row: 6 SC on the index finger, SC on the index finger and SC on the middle finger knit together DEC, 3 SC on the middle finger, SC on the middle finger and SC on the little finger knit together DEC, 5 SC on the little finger, SC on the little finger and SC of the middle finger knit together DEC , SC on the middle finger (18)
Important! The marker for the beginning of the row runs down the middle of the back of the hand. Make sure that the marker does not slide out during knitting, if necessary, knit offset loops.
2nd row: SC, INC, (2 SC, INC) * 5, SC (24)
3rd row: 24 SC (24)
In the next row we tie the thumb.
4th row: 4 SC in the palm, 3 SC together with the thumb (simultaneously grab SC of the palm and SC of the thumb), 17 SC in the palm (24)
5 row: 4 SC in the palm, 4 SC in the thumb, 17 SC in the palm (25)
6 row: 25 SC (25)
7 row: SC, (2 SC, DEC) * 6 (19)
8 row: 4 SC, DEC, 8 SC, DEC, 3 SC (17)
Important! Decreases in the 8th row are in the middle of the ribs of the palm above and below. If necessary, knit offset loops.
We fill the fingers and palm with filler.
We tie it up to the middle of the upper edge of the palm, transfer the marker here.
Change the thread to light blue.
9 row: 17 SC (17)
10 row: INC, 8 SC, INC, 7 SC (19)
Important! Increases in the 10th row are in the middle of the ribs of the palm above and below. If necessary, knit offset loops.
11 – 12 row (2 rows): 19 SC (19)
Row 13: for BLO INC, 8 SC, INC, 9 SC (21)
14 – 20 row (7 rows): 21 SC (21)
Row 21: INC, 9 SC, 2 INC, 9 SC (24)
Note: 2 INC forms a cubot.
We insert the wire blank into the handle. We fill the handle with filler.
22 – 29 row (8 rows): 24 SC (24)
We fix the thread, cut it off. We fill the handle to the end.
We turn the handle in the direction of the palm away from ourselves.
We attach a light blue thread to the first half-loop of the 13th row left where we knitted for BLO, and knit the cuffs of the sleeves of the shirt.
1 – 5 row (5 rows): 19 SC (19)
We fix the thread, cut it off, hide the ends.
Sew a blue button 8 mm in diameter on top of the cuff.

Stage 3. Legs.
We knit the sole of the shoes with white threads.
1 row: we collect a chain of 10 CH + 2 CH, in the third loop from the hook 4 DC, then 8 DC along the chain of CH, 5 DC in the last loop, 8 DC on the other side of the chain of CH, SL-ST (26)
2nd row: 2 CH, DC in the same loop, 4 INCDC, 8 DC, 5 INCDC, 8 DC, SL-ST (36)
3rd row: 2 CH, DC in the same loop, DC, (INCDC, DC) * 4, 8 DC, (INCDC, DC) * 5, 8 DC, SL-ST (46)
According to the resulting trail, we cut out two blanks from white plastic or cardboard.
4th row: for BLO 16 SC, 3 HDC, 21 DC, 3 HDC, 3 SC (46)
Important! DC should be located in the front center of the toe. If necessary, knit offset loops.
In the fourth row, we cut the thread, but do not fix it, that is, we pull it out and leave the loop, it will be useful to us further.
We knit the toe of the shoe with a white thread.
1st row: cast on 3 CH + 1 CH, in the second loop from the hook SC, then 2 more SC along the chain of CH, 3 SC on the other side of the chain of CH, CH, turn (6)
2nd row: SC, 3 INC, 2 SC, CH, turn (9)
3rd row: (SC, INC) * 3, 3 SC, CH, turn (12)
4th row: SC, INC, (2 SC, INC) * 2, 4 SC, CH, turn (15)
5 row: SC, INC, (3 SC, INC) * 2, 5 SC, CH, turn (18)
Tie the straight side of the toe SC: 11 SC (11)
We do not cut the thread, we continue to tie the toe to the shoe as follows: we hook the BLO of the toe and the FLO of the shoe, we knit them SL-ST (see photo below). We fasten the thread on the last loop, cut it off.
We insert the plastic insole into the shoe.
Change the thread to orange and continue to knit the shoe where we left the loop stretched out in the fourth row.
5 row: for BLO we knit SC in a circle: 22 SC at the boot, 11 SC at the toe, 7 SC at the boot (40)
6 row: DEC, 11 SC, DEC, 5 SC, DEC, 11 SC, DEC, 5 SC (36)
7-9 row (3 rows): 36 SC (36)
Cut off 1 m of wire. Fold in half, make a loop at the end in the shape of the foot, twist the ends.
We make two such blanks. We insert the wire blank into the leg. We fill the boot with filler.
Change the thread to red.
10 row: 36 SC (36)
11 row: for BLO 36 SC (36)
12th row: 2 SC, DEC, (4 SC, DEC) * 5, 2 SC (30)
13 – 32 row (20 rows): 30 SC (30)
We fill the leg with filler while knitting.
33 row: (4 SC, INC) * 6 (36)
34 – 35 row (2 rows): 36 SC (36)
We tie the last 35th row to the middle of the inner side of the leg, fasten the thread, cut it off.
We attach the red thread to the first left half-loop of the 11th row where we knitted for BLO, and knit a “flare” at the panties.
1 row: (5 SC, INC) * 6 (42)
2-4 rows (3 rows): 42 SC (42)
We fix the thread, cut it off, hide the ends.
On the bottom of the pants we embroider “stitching” with blue or blue “Iris” threads.
We knit the second leg in the same way, but in the 35th row we do not cut the thread, but leave it and connect the legs into the body.
Stage 4. Body.
On the leg where the thread was left uncut, dial 3 CH, connect it to the second leg:
1 row: 36 SC on one leg, 3 SC on the CH chain, 36 SC on the second leg, 3 SC on the other side of the CH chain (78)
We twist the wire from the legs, isolate the ends with adhesive plaster or electrical tape.
2nd row: 34 SC, (INC, SC) * 2, INC, 34 SC, (INC, SC) * 2, INC (84)
We tie it to the middle of the right side and transfer the marker for the beginning of the row here.
3 – 10 rows (8 rows): 84 SC (84)
We embroider a fly on the pants with blue or blue “Iris” threads.
Change the thread to light blue and knit the shirt further.
11 – 41 rows (30 rows): 84 SC (84)
The 41st row is not tied to the middle of the side 3 SC.
We fill the body with filler.
In the next row we tie our hands.
42 row: 6 SC with the right handle (simultaneously grab the SC of the arms and SC of the body), 36 SC on the body, 6 SC together with the left handle, 36 SC on the body (84)
43 row: 18 SC on the right handle, 36 SC on the body, 18 SC on the left handle, 36 SC on the body (108)
We fasten the wire from the handles to the main winding coming from the legs, the ends are well insulated with adhesive plaster or electrical tape.
44 row: 108 SC (108)
45 row: (18 SC, DEC, 32 SC, DEC) * 2 (104)
46 row: (18 SC, DEC, 30 SC, DEC) * 2 (100)
47 row: (18 SC, DEC, 28 SC, DEC) * 2 (96)
48 row: (18 SC, DEC, 26 SC, DEC) * 2 (92)
49 row: (18 SC, DEC, 24 SC, DEC) * 2 (88)
50 row: (18 SC, DEC, 22 SC, DEC) * 2 (84)
51 row: (18 SC, DEC, 20 SC, DEC) * 2 (80)
52 row: (18 SC, DEC) * 4 (76)
53 row: (18 SC, DEC, 16 SC, DEC) * 2 (72)
We fill the body with filler.
54 row: 5 SC, DEC, (10 SC, DEC) * 5, 5 SC (66)
55 row: 66 SC (66)
Change the thread to light beige.
56 – 57 row (2 rows): 66 SC (66)
We fasten the thread, cut it, leaving a long end for sewing on the head.
Stage 5. Ears.
We knit two pieces of brown color – this is the outer side of the ear, and two pieces of light pink color are the inner side of the ear.
Pink lug details:
1 row: we cast on 12 CH + 1 CH, from the second from the hook of the loop 12 SC, CH, turn (12)
2nd row: INC, 10 SC, INC, CH, turn (14)
3-4 row (2 rows): 14 SC, CH, turn (14)
5 row: INC, 12 SC, INC, CH, turn (16)
6 – 7 row (2 rows): 16 SC, CH, turn (16)
8 row: INC, 14 SC, INC, CH, turn (18)
9 – 22 row (14 rows): 18 SC, CH, turn (18)
23 row: DEC, 14 SC, DEC, CH, turn (16)
24 – 25 row (2 rows): 16 SC, CH, turn (16)
26 row: DEC, 12 SC, DEC, CH, turn (14)
27 – 28 row (2 rows): 14 SC, CH, turn (14)
Row 29: DEC, 10 SC, DEC, CH, turn (12)
30 – 31 rows (2 rows): 12 SC, CH, turn (12)
32 row: DEC, 8 SC, DEC, CH, turn (10)
We fix the thread, cut it off.
We knit the brown details of the ears in the same way, but we do not cut the thread on them.
We continue to knit, connect the details of the ears, tying along the SC contour (see photo below).
We do not sew the finished ears yet.
Stage 6. Tail.
We knit with a light beige thread.
1st row: 5 SC into magic ring (5)
2nd row: 5 SC (5)
3rd row: 5 INC (10)
4-9 row (6 rows): 10 SC (10)
10 row: (SC, INC) * 5 (15)
11 – 22 row (10 rows): 15 SC (15)
We fasten the thread, cut it, leaving the end for sewing on the tail. Lightly fill the tail with filler. Do not sew yet.
Stage 7. Design of the muzzle.
First, we make markings for tightening using colored pins.
1) We count from the crown of 30 rows of SC down and in the middle of the protruding part of the muzzle we put a blue pin (point), in this place the nose will be located.
2) Go up from the blue pin (point) 2 rows of SC perpendicularly upwards, then step back 6 SC to the left and put a green pin (point).
3) We count from the green pin (point) 2 more SC to the left and put a red pin (point).
4) Go up from the blue pin (point) 2 rows of SC perpendicularly upwards, then count 6 SC to the right and put a white pin (point).
5) We count from the white pin (point) 2 more SC to the right and put a pink pin (point).
The markup is ready, we proceed to the tightening itself. To do this, we need a long needle and a nylon thread or fishing line.
We insert the needle in the last row of knitting in the center of the head at the back, we output it at the pink point, again we enter it at the white point and output it in the green one, we insert it at the red point and output it into the open hole of the head. We tighten the thread, tie the ends of the thread into several knots (see photo above).
In place of the blue pin, put a plastic black nose, glue it with super glue.
Cut out two round blanks from white felt with a diameter slightly larger than the diameter of the plastic pupils, that is, about 20 mm. We make small cuts in the middle of the felt blanks, insert plastic pupils with a diameter of 16 mm into the cuts. We try on the resulting eyes on the head, put them 3 rows of SC above the ties made.
Sew the felt blanks to the head with small stitches with small stitches with brown Iris threads.
We glue the plastic pupils with super glue.
We embroider the groove running from the spout with brown threads (see photo). We step back from the nose 15 rows of SC down and embroider the mouth with brown Iris threads.
Go up from the eyes 7 rows SC up and embroider the eyebrows with brown threads.
With dry pastels (or ordinary matte shadows) of a dark brown color, we tint the eyes, slightly the nose and mouth. We draw with dry pastel a strip on the head and back of the head.
We retreat from the crown of the head about 5 rows of SC and sew on the left and right ears.
Stage 8. Vest.
First, we knit the bottom elastic with yellow threads, turning rows, all rows behind BLO.
1st row: cast on 5 CH, from the second from the hook of the loop 4 SC, CH, turn (4)
2 – 73 rows (72 rows): 4 SC, CH, turn (4)
Fold the edges of the resulting elastic together and connect SC, but for both half-loops.
Next, we knit the top of the vest. The row start marker is located in the middle of the right side.
1st row: tie elastic in a circle SC: 74 SC (74)
From the 2nd row, we begin to knit a pattern using the jacquard crochet technique.
2 – 3 rows (2 rows): 46 SC in yellow, 2 SC in light green, 6 SC in yellow, 2 SC in blue, 6 SC in yellow, 2 SC in light green, 10 SC in yellow (74)
4 – 5 rows (2 rows): 48 SC in yellow, 2 SC in light green, 2 SC in yellow, 6 SC in blue, 2 SC in yellow, 2 SC in light green, 12 SC in yellow (74)
6 – 7 rows (2 rows): 50 SC in yellow, 2 SC in light green, 6 SC in blue, 2 SC in light green, 14 SC in yellow (74)
8 – 9 rows (2 rows): 48 SC in yellow, 2 SC in blue, 2 SC in yellow, 2 SC in light green, 2 SC in blue, 2 SC in light green, 2 SC in yellow, 2 SC in blue, 12 SC yellow (74)
10 – 11 (2 rows): 46 SC in yellow, 6 SC in blue, 2 SC in yellow, 2 SC in light green, 2 SC in yellow, 6 SC in blue, 10 SC in yellow (74)
12 – 13 rows (2 rows): 48 SC in yellow, 2 SC in blue, 2 SC in yellow, 2 SC in light green, 2 SC in blue, 2 SC in light green, 2 SC in yellow, 2 SC in blue, 12 SC in yellow (74)
14-15 rows (2 rows): 50 SC yellow, 2 SC light green, 6 SC blue, 2 SC light green, 14 SC yellow (74)
16 – 17 rows (2 rows): 48 SC in yellow, 2 SC in light green, 2 SC in yellow, 6 SC in blue, 2 SC in yellow, 2 SC in light green, 12 SC in yellow (74)
18 – 19 rows (2 rows): 46 SC in yellow, 2 SC in light green, 6 SC in yellow, 2 SC in blue, 6 SC in yellow, 2 SC in light green, 10 SC in yellow (74)
The jacquard pattern ends in the 19th row, then we continue to knit only with yellow threads.
20-24 row (5 rows): 74 SC (74)
We do not tie the last 24th row to the middle of the side, i.e. to the marker of the beginning of the row, 5 SC and transfer the marker.
We put on the vest on the body and only after that we begin to knit the straps.
25 row: 24 CH, 10 SC skip, 27 SC, 24 CH, 10 SC skip, 27 SC (102)
26 row: DEC, 22 SC strap, DEC, 25 SC, DEC, 22 SC strap, DEC, 25 SC (98)
27 row: DEC, 9 SC, DEC, 10 SC, DEC, 24 SC, DEC, 9 SC, DEC, 10 SC, DEC, 24 SC (92)
28 row: 3 DEC, 13 SC, 3 DEC, 21 SC, 3 DEC, 13 SC, 3 DEC, 21 SC (80)
29 row: DEC, 17 SC, DEC, 19 SC, DEC, 17 SC, DEC, 19 SC (76)
We fix the thread, cut it off, hide the ends.
Sew the head and tail to the body. The ponytail is located on the border of the vest and pants in the center at the back.
Stage 9. Points.
Cut off about 60 cm of wire. We make a blank of glasses from wire according to the scheme.
Dushki about 11 cm.
To make the rims of the glasses even, take any round object with a diameter of about 4 cm and wrap the wire around this object.
The distance between the rims is 1 cm.
After the wire blank is ready, we take the super-glue, spread it on the tips of the darlings and tightly wrap the wire with red thread over all glasses.
We also spread the places where the thread ends with glue, and then wrap it, cut off the excess thread.
With small pliers or round-nose pliers, we bend the tips of the darlings inward.
The glasses are ready! You can put them on Clever-G!
Stage 10. Scarf.
We knit with light green threads.
1st row: we collect a chain of 200 CH + 2 CH, from the third from the loop of the loop 200 DC, 2 CH, turn (200)
2 – 4 rows (3 rows): 200 DC, 2 CH, turn (200)
In the last 4th row, we do not knit 2 CH, but fasten the thread, cut it off.
The scarf is ready! We put on a scarf on Umnik-G. Correcting tint and glasses.
Congratulations!!!
ready !!!